This post may contain affiliate links, which means I'll earn a small commission if you purchase something through these links. You won't pay any extra; instead, you'll be helping Aloha With Love to thrive. Thank you! Learn more.
--
Hawaii shut down late March (I was also furloughed) and during the month of April I spent as much time as I could catching up on Netflix, Viki, YouTube, cooking, eating, reading, and sleeping. By the end of April, I was getting tired from my new “daily grind” and decided I needed to take advantage of this extra time by doing something BIG.
News of possible food shortages were popping up, which worried me (I take my food seriously). My Mom was also out late at night every night killing slugs and snails that were eating up all her vegetables. So I decided my BIG project had to be an aquaponics system. Our family would be able to grow our own vegetables and fish, and we wouldn’t have to worry so much about the slugs and snails that love to munch on those young and tender shoots.
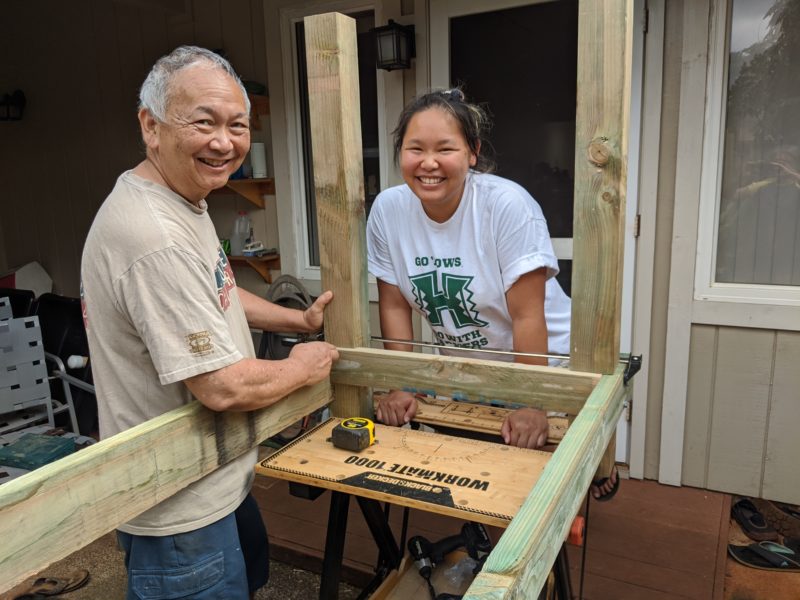
Right now I’m 2 months in and almost done, but thought I’d document my journey for those of you who are interested in a home aquaponics setup in Hawaii. Wherever you may be, I hope you have a little (or BIG!) project keeping you busy, happy, and healthy. Also, a BIG HUG AND THANK YOU to my Dad who helped me out with this build and let me borrow all of his tools. Thanks, Dad!
Aloha with love,
Amy
Learning All About Dados And How To Miter Saw
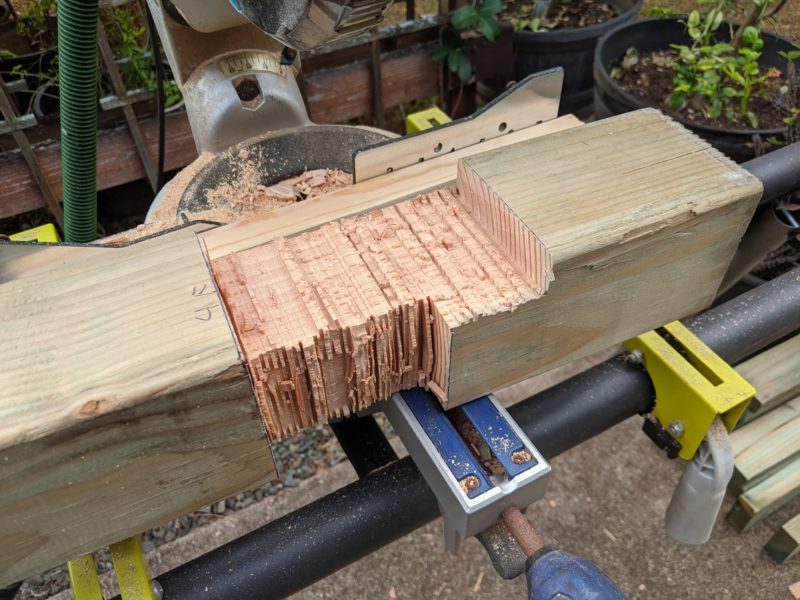
What I learned: “Dado” – Those cuts we made into the 4×4 legs where 2x4s would sit in. I learned that this type of foundation built with dados is excellent for big and heavy projects as it makes for an incredibly strong base. This baby is not going to fly apart.
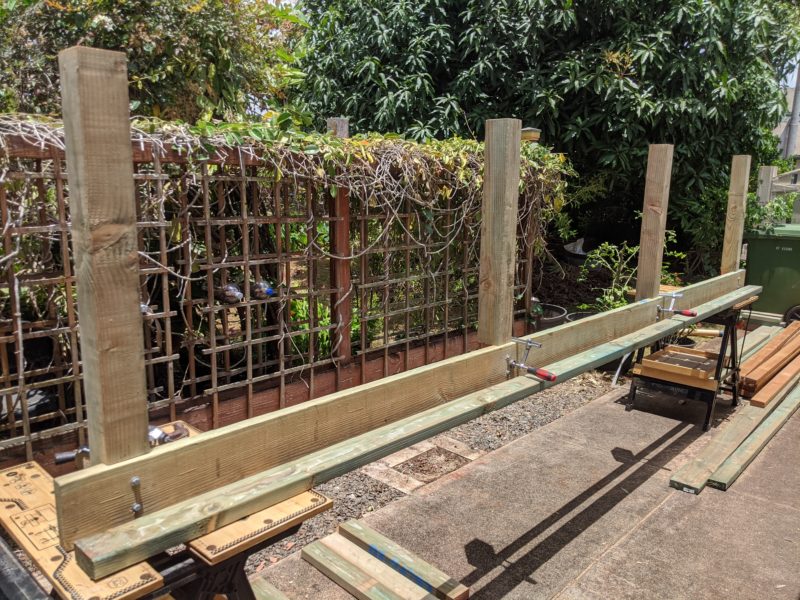
Before we could even begin to cut wood, we had to level the ground. Using some sand and brick that had been sitting in the backyard forever, my brother and I made a flat base for the aquaponics foundation to sit on. We then used my Dad’s laser level to measure where all the dadoes should be on each leg. This is much easier to do at night because the red laser light is visible. Each leg ended up being a different height, but because the dadoes were measured correctly, the entire thing was pretty darned straight when we finished!
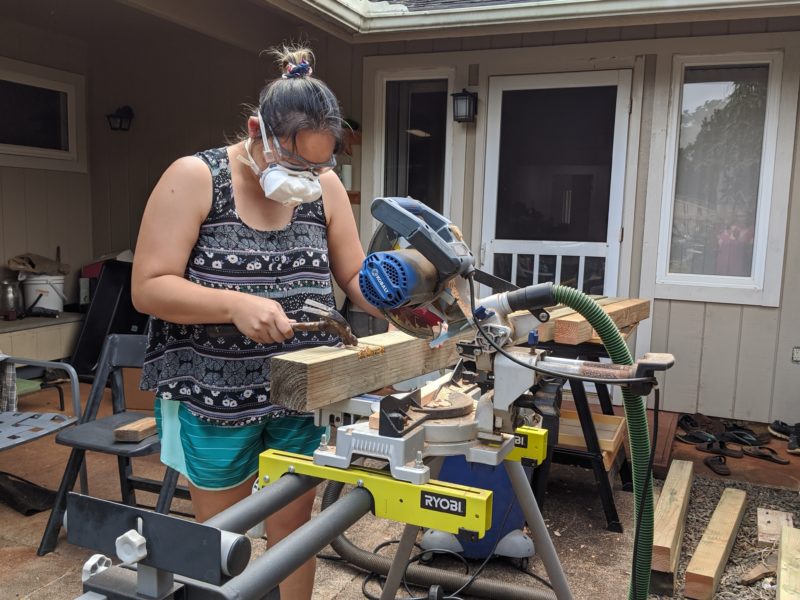
Cutting dadoes are a cinch; it’s just a little time consuming. Using a miter saw, I cut several slits into the 4×4 and used a hammer to hit and chip away at all the bumpy wood pieces in between. I smoothed the insides with a chisel and by the end of the day I had 8 dadoed leg posts for my foundation.

Nuts, Bolts, Washers, And Clamps
It’s a long-running joke between Dad and me: You can never have too many clamps…and if you don’t know what to buy a guy for Christmas, buy him clamps.
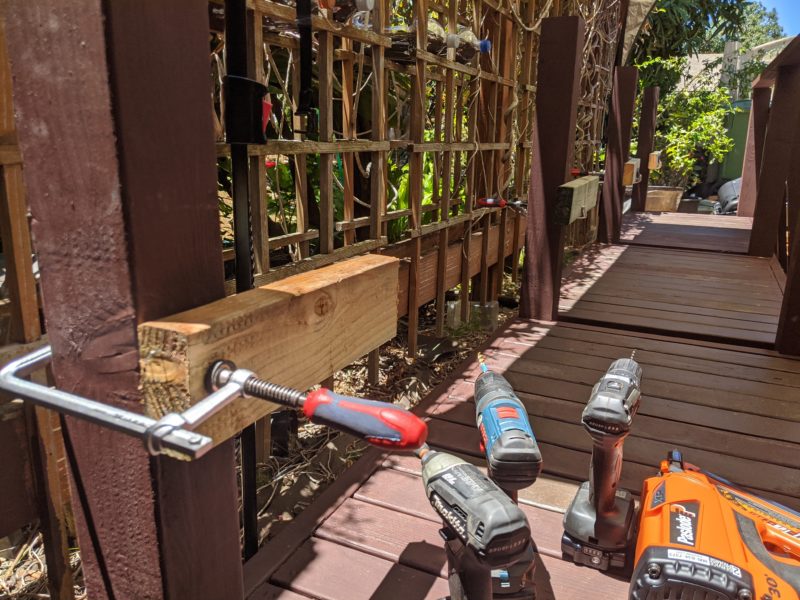
Once I had all the dadoes cut and the wood pieces bought, Dad and I started to put everything together. This was definitely a 2-person job. We were lucky because all the wood we bought happened to be pretty straight even after we ripped them. The only times we needed Mom or Michael to help out was when we had to lift and flip to work on certain sections.
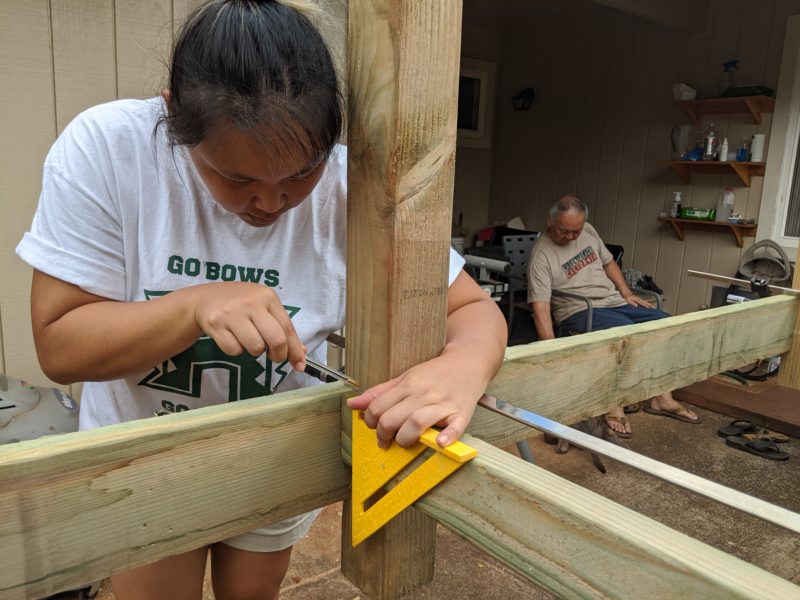
I learned how to use a speed square (while Dad instructed from the shade) and found out that these things are the most convenient things ever! It certainly made life easy since I was originally using a tape measure and the power of my eye to measure, draw straight lines, and figure out right angles. I used the speed square to figure out where the bolts were going to go and to make sure everything was level.
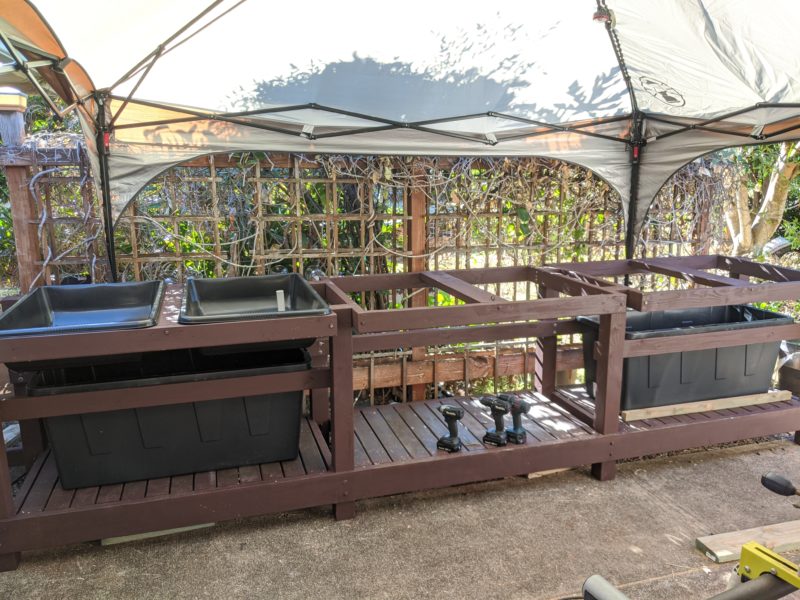
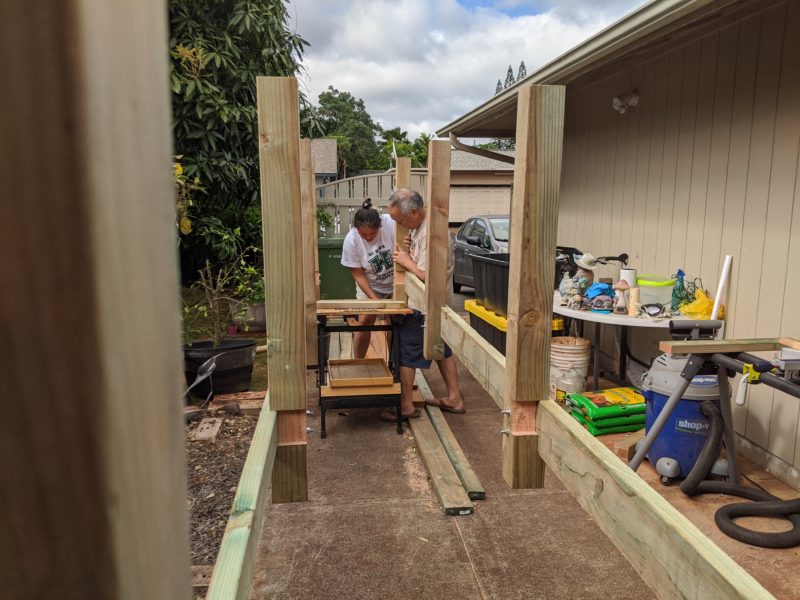
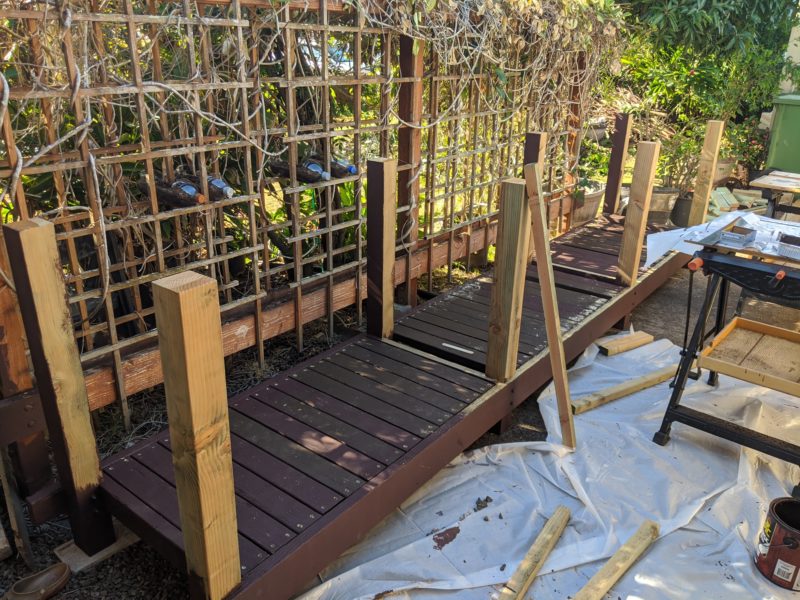
After we did the front and back of the foundation, we connected the two with cross pieces at every leg post. Since we planned on adding additional support later to stop the fish tanks from bulging out when filled with water, we made sure that the fish tanks could slide in and out of the foundation easily and the supports would fit in perfectly.
Once the legs and frame were set, we moved onto the supports for the floor with a staple gun. The staples just held this piece in place and I followed up with a few screws to permanently secure them to the foundation. I cut a bunch of 2x4s to sit on these supports crosswise to create the floor. Since the fish and sump tanks would sit on these pieces, we painted these first with a quality outdoor paint before screwing them into place. The last thing we wanted was the bottom to rot if there happened to be a leak or water collecting in some hard-to-reach place.

Painting And Caulking
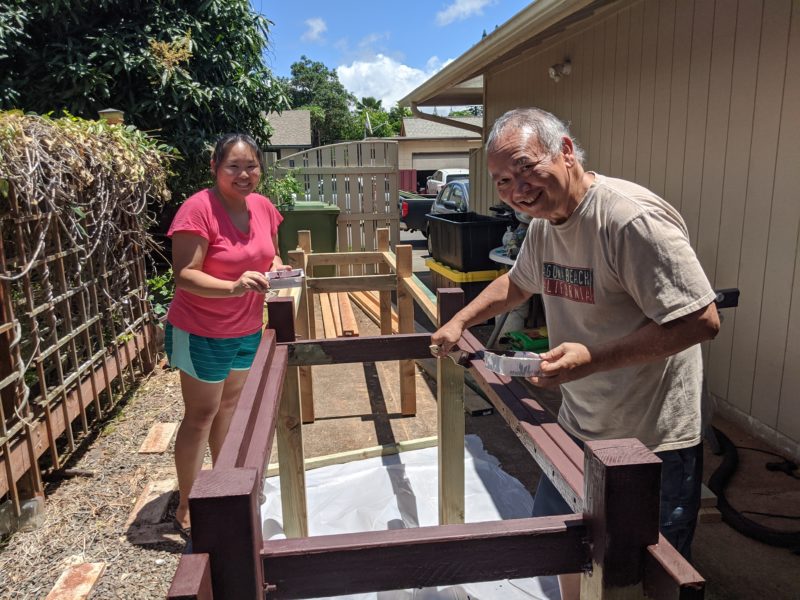
Once the frame was finished, we flipped this over and painted whatever we could reach. Most important was the bottom and back of the frame because once we positioned it against the trellis, we wouldn’t be able to reach the bottom or back. It’s important to use a quality outdoor paint for any wood projects outside not just because of the rain, rainy season, and occasional storm, but also because of the termites. Using treated wood is not enough. You need that layer of thick paint to block the termites because eventually they will eat through treated wood. Dad knows this from experience and I’ve seen it several times growing up.
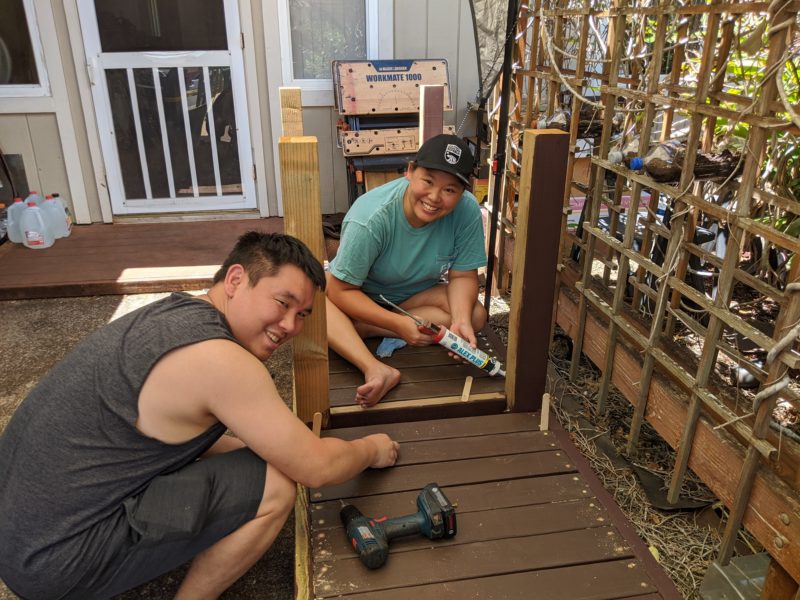
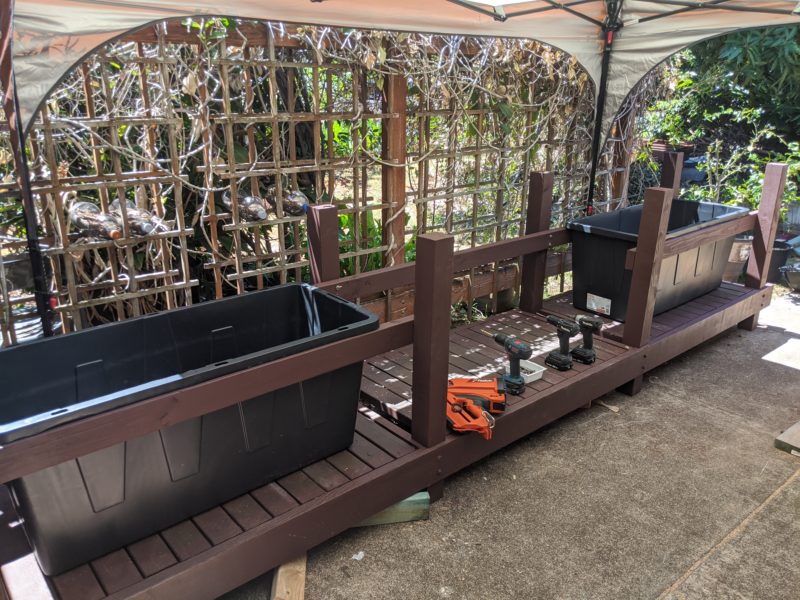
Once we got the bottom and back painted, it took 3 of us to flip the frame right-side-up and position it against the trellis. We finished painting everything else and Michael and I set up a pop-up tent so we could work on the cross pieces in the shade. To keep the distance between each cross piece the same, we used 2 popsicle sticks between each piece as a spacer.
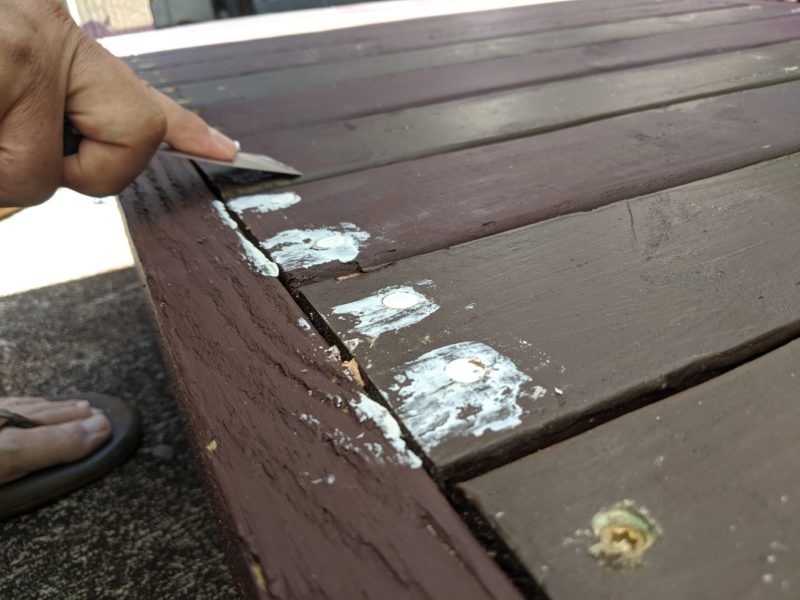
After screwing each piece in, we covered each screw head with caulk because the screws went in deep and left some of the wood exposed. To prevent weather and termite damage (and for aesthetic purposes), Michael and I took turns painting over the caulk with more outdoor paint.
Making The Fish Tank And Growbed Frames
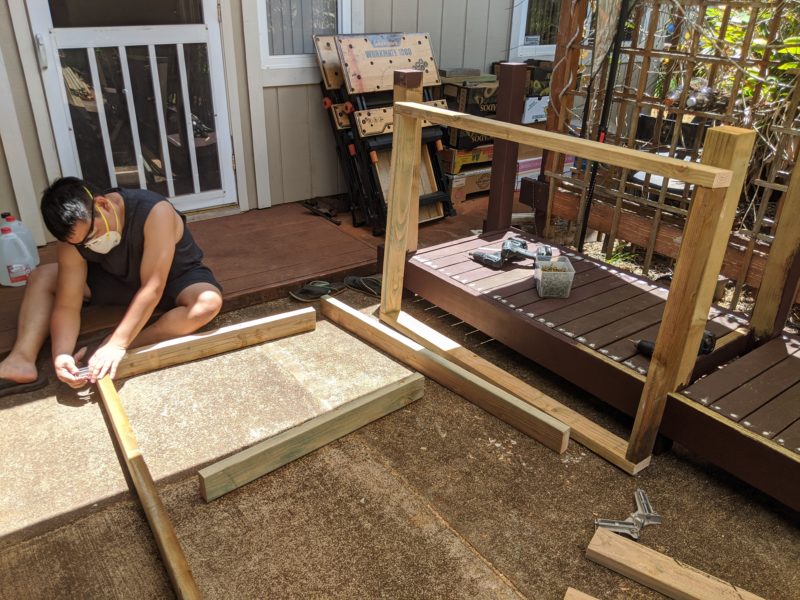
The frames for the fish tanks and growbeds were made simultaneously. Michael worked on the 3 growbed frames, each holding 2 growbeds. These were somewhat difficult to fit between the posts as we had to physically pull the posts apart to slide the frames in. It was an incredibly snug fit and I wish we had made them just a tad smaller. By the time we put in the last one (right end), we were using several clamps and had to use a lot of force to get the frame to fit between the posts. At one point I even thought it might not be possible – glad I was wrong!
Before we even started on the construction, I filled up one of the 55-gallon fish tanks with water as a test. The plastic began to bulge outwards once it filled halfway. Not good since the fish tanks were going to be filled with water all the time. While Michael worked on the growbed frames, I started on the fish tank supports that would go on both ends of the foundation. Using clamps, blocks of wood, and a level, I screwed in the back support and the two front supports on either end. Once the fish tank supports and growbed frames were in, we slid in the plastic bins and I’m happy to say everything slid in with ease.
Thoughts
I’m really happy with how the foundation turned out. This was certainly a huge project for me – it required some help as there was a lot of heavy lifting, but once we did all of the planning, it only took time to put everything together. You can tell this thing is rock solid, too. None of the legs wobble and before I added the growbeds and fish tanks, everyone was treating this as a boardwalk and walking/sitting/lying down all over it. It’s definitely not going anywhere and when you look at its length from the sides and corners, the posts and supports are as straight as can be. Even Dad was surprised and exclaimed “that never happens!”
The next step is to put in the other growbeds (I’m waiting for them to arrive) and begin the plumbing. I’ll also add a couple of solids filters and a sump tank in the middle. Once everything is in, I’ll connect everything with uniseals and 1-inch PVC pipe.
Anybody else out there working on a solid foundation for a big outdoor project like this? Let me know in the comments below and we can compare notes!