This post may contain affiliate links, which means I'll earn a small commission if you purchase something through these links. You won't pay any extra; instead, you'll be helping Aloha With Love to thrive. Thank you! Learn more.
--
When I was first starting out with aquaponics, I decided to start small with a simple 5-gallon set up. I saw a few people creating simple systems using those 5-gallon water jugs that a lot of companies and homes have installed. The trick is finding one (the companies always want them back), but once you’ve got one, they make a great DIY project for children or for anyone just starting out on aquaponics. This particular system helped me understand the basics of an aquaponics system, so I recommend starting out on something small like this so you can understand how your big system will work.
Aloha with love,
Amy
Where to get a 5-gallon water jug?
It was actually pretty hard for me to find a 5-gallon water jug here on Oahu, but here’s what my experience was like:
Craigslist: This turned out to be the best option for me by far. When I first searched for “water jug” and “5 gallon” on the For Sale section on Craigslist, I found 2 people selling their water jugs. One person was selling theirs for the high price of $15 each, but the other seller priced his out at just $5 per jug. I called over and picked 10 of them up in the same day.
In fact, I just checked Craigslist again (several months later) and there are now 5 different people selling their used 5-gallon water jugs for about $5 a piece. My favorite were the Menehune Water Co. jugs as their sticker was easy to peel off and made for the perfect window size (if you want a window).
Asking friends: I reached out to my friends to see if any of them had a spare water jug they had at either home or work. Unfortunately, this was at the beginning of the pandemic so many of them were out of work. Outside of the pandemic, this may be a possible option for you.
Purchasing online: There were 5-gallon water jugs being sold online; however, the ones I found all had a side handle that cut into the cylindrical body of the jug. I wanted to avoid this as much as possible, plus it didn’t make sense to pay for shipping to Hawaii when I knew it was possible to buy these cheap.
Local water companies: I gave the local water companies a call to see if they had old ones they were going to throw away, but I was told that they do not give these out to sell or to the public (even when old or damaged).
Helpful DIY plans
My favorite video that helped me plan this out was by Why Am I Green:
The system he created was an ebb-and-flow system with a bell siphon, hydroton, and just looked really professional and sleek. I did deviate from his design, but the free plans on his website helped a bunch in planning everything out initially.
Another helpful video was by Hungry Heart:
He also created an ebb-and-flow system and even shows you how his harvest of pea sprouts went.
My build
As someone who had zero experience with plumbing and didn’t understand words like “hose clamp” or “bulkhead”, I felt really intimated to do an ebb-and-flow system. The mouth of the water jug seemed impossible to hook up to pipes in my eyes and I didn’t feel like going to my local hardware store and feeling lost in the pvc and plumbing section (which I often did then). Now I know my way around, but in the beginning creating this seemed like a huge monumental effort with a steep learning curve.
So after some research, I decided to go with just a constant flow aquaponics system. Instead of a bell siphon and attaching the mouth of the jug to connecting pipes, all I’d need was the top of plastic water bottle and a green scrubber to act as a filter. This worked fantastically.
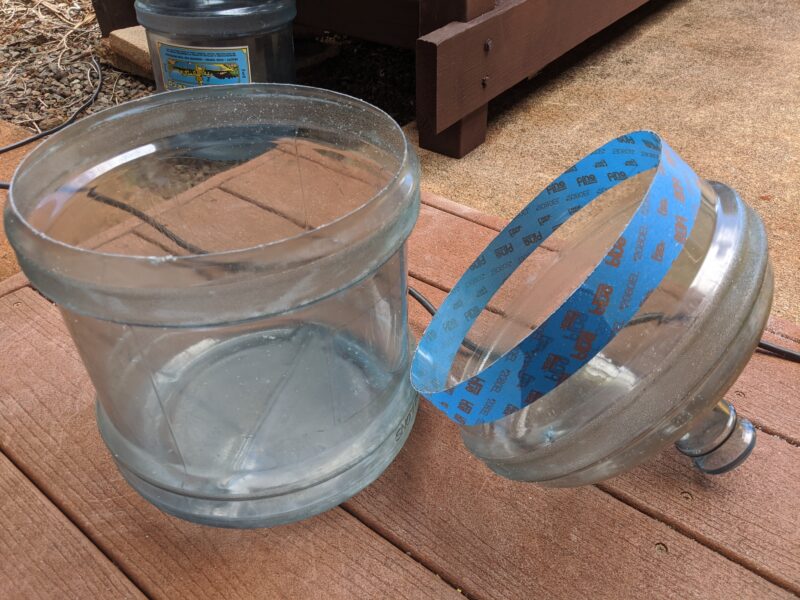
Cut the water jug: I used blue painter’s tape to create a straight line 1/3 down from the top of the jug. Using a multi-purpose tool, I cut along one edge of the tape and I had 2 pieces very cleanly cut.
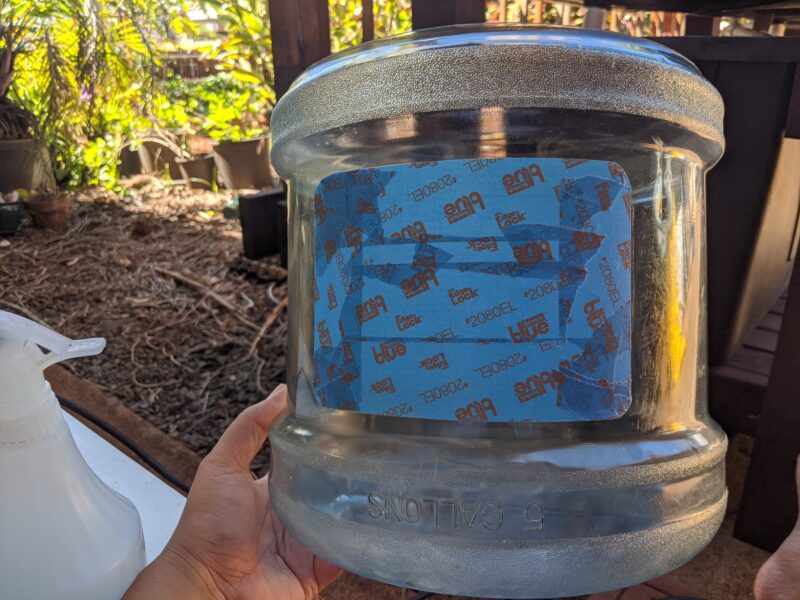
Spray painting black: Next I used painter’s tape to block my window. The reason why I like the Menehune Water Co. water jugs is because their stickers are placed on a pre-lined section that’s perfect for a window. As for the paint, I used a black paint made for plastics that I got at my local hardware store, City Mill. The paint is still holding up today even under direct sun on a daily basis.
Do you need a window? If you plan to have this indoors or outside in the shade, then a window is actually very nice to have. Initially, I had this set up on a small table right outside my front door. No direct sunlight hit it and anyone sitting outside the front door (which my Mom and I often do) would be eye-level with the goldfish.
However, the sprouts that I was attempting to grow at the time did very poorly under the shade. Once I moved the system to a sunnier spot, the window filled up quickly with algae and it was difficult to see anything. So plan for a window only if you intend on using it, otherwise it’s just extra work.
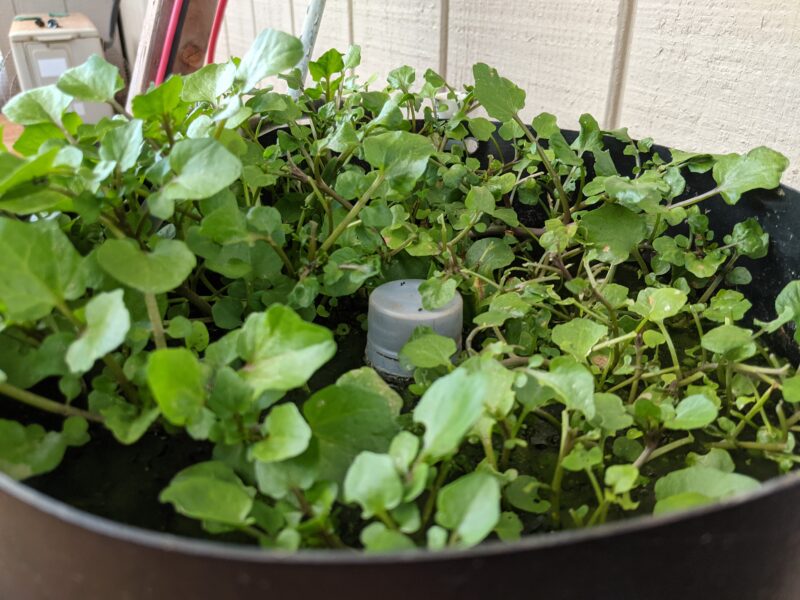
The plumbing: Since I decided on a constant flow system, I took a 20 oz. soda bottle, cut off the top 1/3 (with the cap on) and drilled several holes into the neck of the bottle in a straight horizontal line. I attached the cut edge of the bottle to the bottom of the grow bed and sealed it with silicone sealant. This dried for one day and so far I haven’t had any leaks.
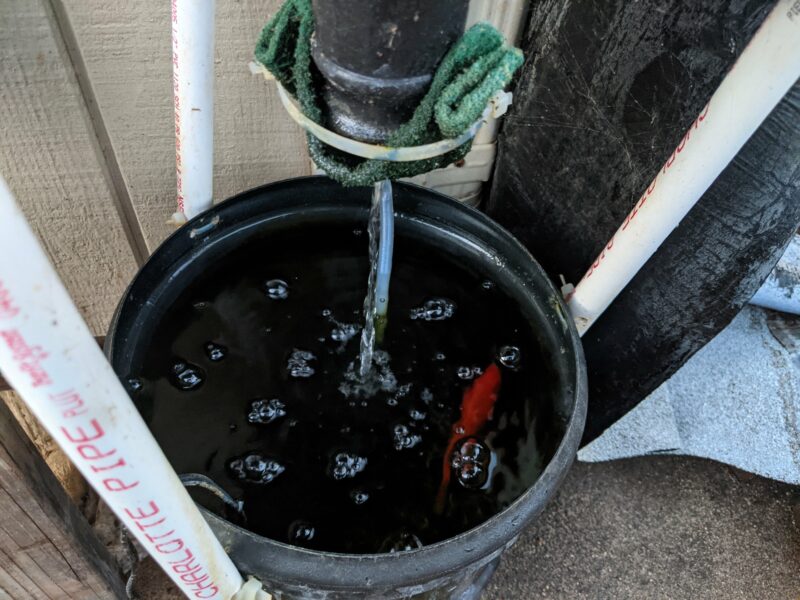
On the mouth of the water jug (the bottom of the grow bed), I wrapped it with a green scrubber and zip tied it to the jug to act as a solids filter. The green scrubber and zip tie is easy to remove and put back whenever I have to clean the scrubber, which makes maintenance easy.
If you decide on a constant flow system, your water doesn’t have to go as high as it would for an ebb-and-flow. I made my soda bottle tall enough so that the water would only come up halfway up the grow bed.
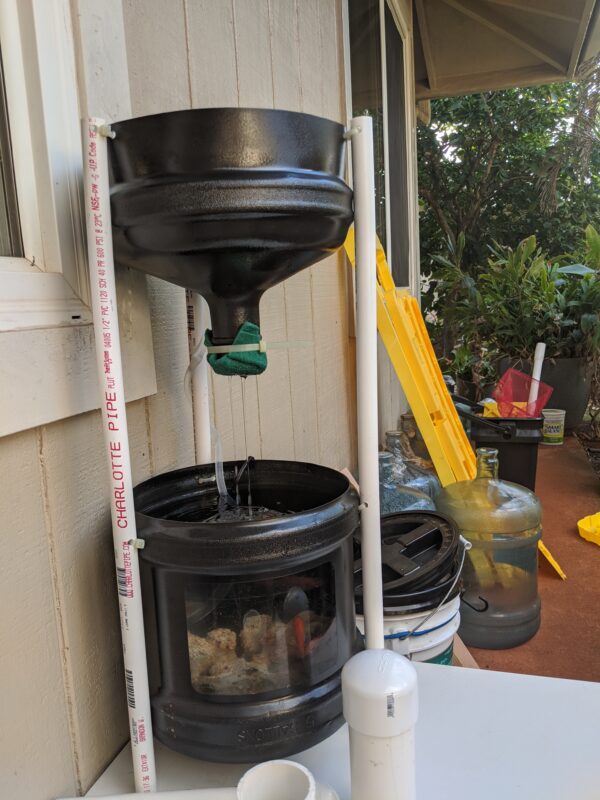
PVC pipe supports: To hold the entire system up, I drilled 6 holes on the top of the fish tank and 6 in the grow bed in the shape of a triangle. In the PVC pipes, I drilled another 12 holes (6 for the fish tank, 6 for the grow bed), and tied everything together with zip ties. While this is relatively stable, the system does twist occasionally, so I recommend adding some bottom supports so that the pipes don’t move.
Sprouts and watercress
Initially, I filled this system up with black lava rock (black cinder) to about an inch beneath the top of the grow bed. While I had a great first harvest of soybean sprouts, they began to rot and the whole system smelled really bad since the plants sat in water all day. I did some research and decided watercress might be a good crop to change to since it does very well in gentle currents.
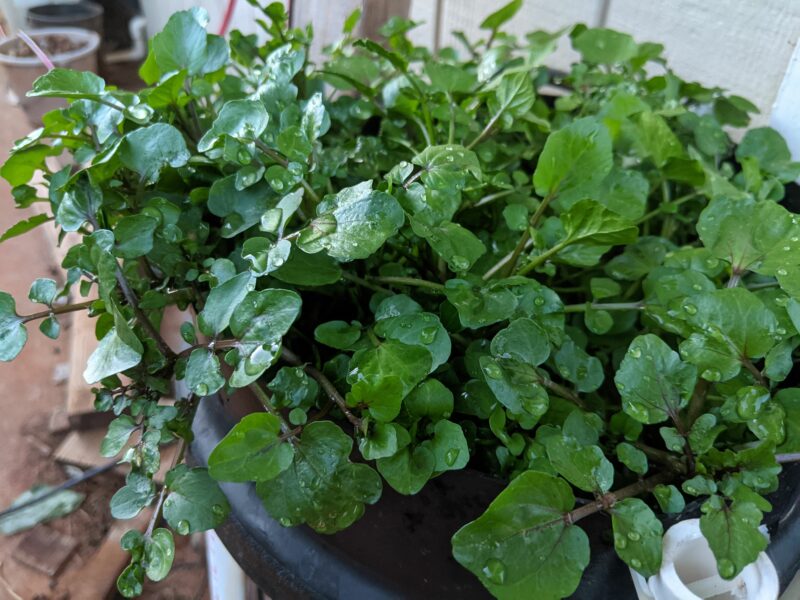
I took out all of the lava rock, gave it a good clean, and added just enough rock to give the watercress something to hold onto (about 4-inches high). Watercress is a crop that keeps on giving as long as you harvest it and here in Hawaii, you’ll almost always find fresh watercress from local farms in the grocery stores.
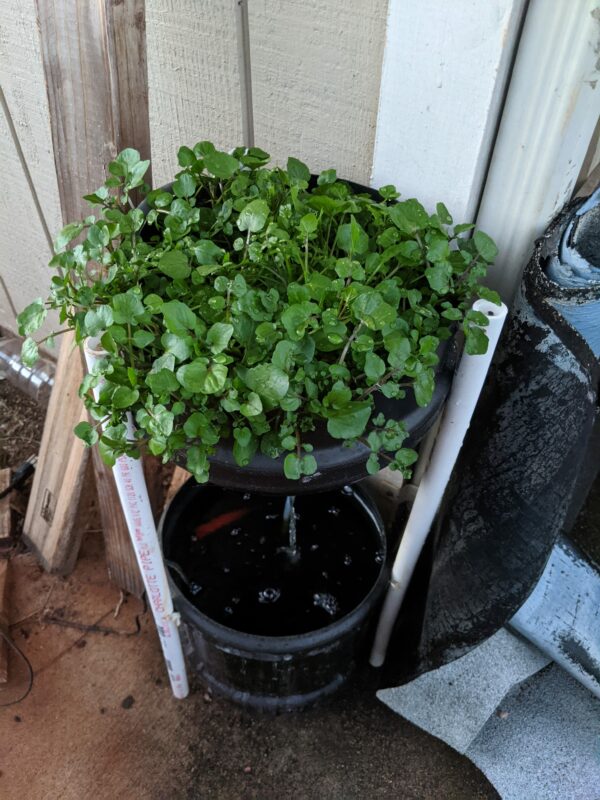
After several months of growing, harvesting, and eating watercress, I have to say this is a great choice for a constant flow aquaponics system in Hawaii. As an aquatic plant, I don’t have to worry about overwatering and the gentle flow of water from the pump to the plastic bottle in the middle creates a perfect current that the watercress thrives in.
Typically, I harvest the watercress once every 2-3 weeks by chopping off the top half. We’ve got 4 grown adults in our family so we throw the watercress onto a salad, into miso soup, or onto some cold cubes of tofu with shoyu. I can see this size of an aquaponics system growing watercress being very useful for a 1 – 2 person household that likes their fresh salads and vegetables.
Fish
I first added 3 goldfish into the system, but eventually reduced it to one. This guy has been eating pretty healthily for a year now and has doubled in size to about 4 inches.
If you’re trying to stay on budget like I was, head to Coral Fish Hawaii for some feeder fish. They’re the cheapest aquarium fish I can find here in Hawaii (besides scooping up whatever’s living in the streams and rivers).
How I deal with bugs
For the first couple of months, my watercress was bug free and I assumed it was because of the naturally strong flavor of watercress. But all of a sudden there were worms everywhere eating up my leaves and for the life of me I could never find all of them. And this was during the winter!
The green worms in particular were experts at camouflaging and at one point I found 7 of them in one go. I’m reluctant to use any insecticides on any of my gardening as they’ll kill the bees, too. So instead, I now pour water on top of the watercress once a day. When I feed the fish, I pour water onto the top (I use empty tofu containers, 2 – 3 pours), which throws the worms and eggs into the water, effectively drowning them.
I’ve been doing this for at least 4 months now and the results have been fantastic. I haven’t seen one worm since and my watercress grows thick and lush with no signs of chewed leaves.