
This post may contain affiliate links, which means I'll earn a small commission if you purchase something through these links. You won't pay any extra; instead, you'll be helping Aloha With Love to thrive. Thank you! Learn more.
--
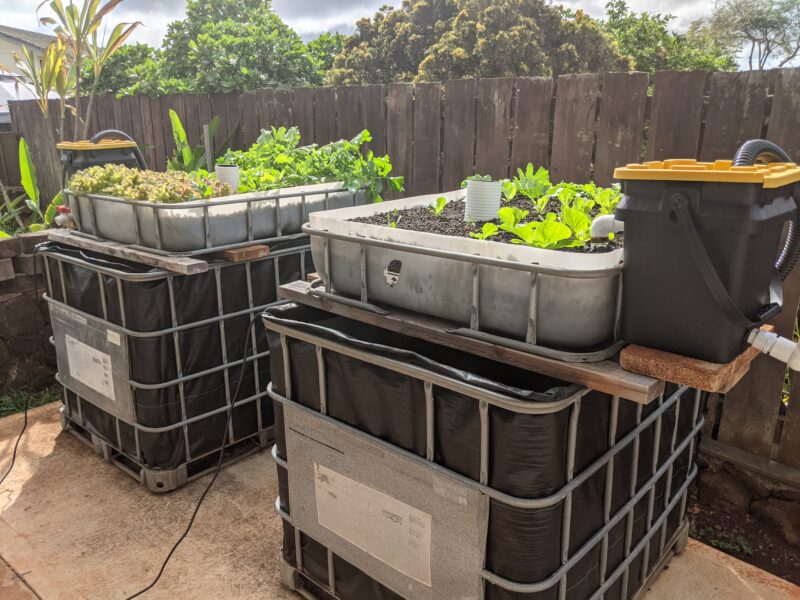
I’ve had my two IBC chop-and-flip aquaponics systems for about half a year now and over time I’ve realized that I hate cleaning the solids filter I had originally installed. My solids filters were buckets filled with shade cloth, netting, and scrubbies. As the water rose in the bucket, the solids would get stuck on the material and clean water came back into the system.
This worked fantastically in the beginning…when my fish were small. But since the IBCs are big enough to host 10 – 20 fish (depending on size and type), my bucket filters were overloaded as the fish became bigger. It’s just a lot of gunk to remove and I found that cleaning the filters were taking up too much of my time.
I decided to upgrade my filters to some large radial flow settlers and decided to document and share my experience for anyone else going through a similar situation with their own aquaponics here in Hawaii.
Aloha with love,
Amy
My original filters
My original system was simple. A pump in the fish tank pushed the water into the bottom of the bucket. As the water rose in the bucket, the shade cloth would naturally filter out the bigger solids and “clean” water at the top would pour back into system via the grow bed.
This worked for the first several months, but I began to notice a change as my fish grew larger (and pooped and ate more). I was cleaning my solids filter more often, which took at least an hour and was incredibly messy. Sometimes I didn’t want to clean my filters and would postpone cleaning for several weeks, which didn’t help my systems any.
After some research, I decided to upgrade my systems with a radial flow settler as a filter. The biggest reason is because cleaning the settler seemed so much easier than other filters. While I haven’t tried it yet (I’ve been too lazy and the fish tank water is still looking clear), it looks like connecting a pump to a hose and spraying the solids out will work perfectly.
On a side note, I’ve decided to upgrade my first aquaponics system in the front yard since I’ve learned a lot about what works, what doesn’t work, and my maintenance preferences. This project is currently underway and I’m documenting the process so I can share it with you all in a later blog post.
Successful radial flow settler build
My successful attempt at building a radial flow settler was actually my second attempt. The first was a disaster that ended up in a sleepless night waking up every 30 – 45 minutes. You read about in detail further down below if you want to avoid what I did.
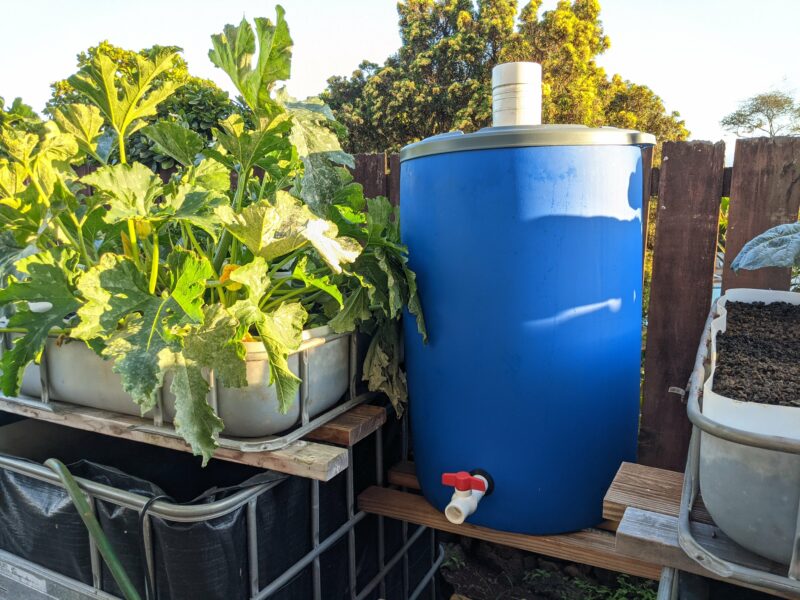
I knew I wanted a larger filter this time. The tilapia and catfish were getting big and the catfish in particular are eating and digesting machines. I also wanted the filter to be large just in case the fish ever had any babies. I knew that if I had a lot of babies all of a sudden, my filter would need to be able to handle all of the extra bodies until I could harvest the larger ones out.
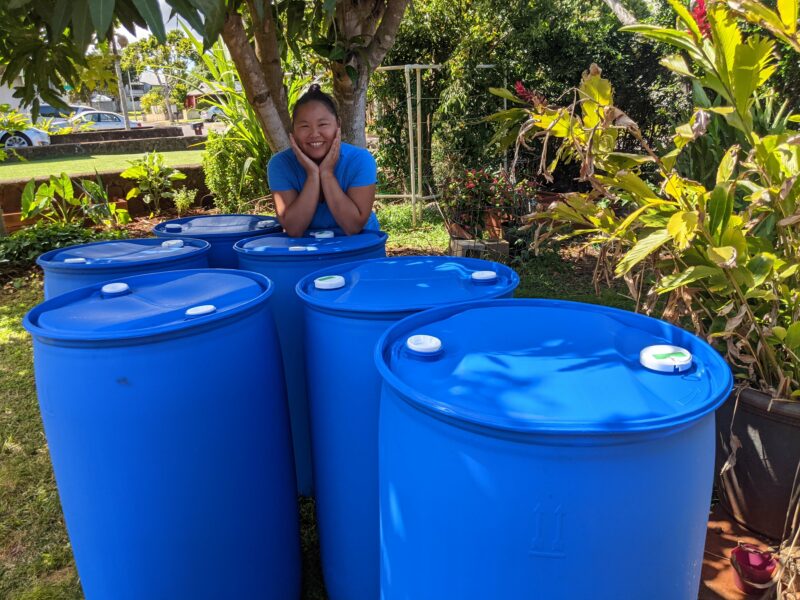
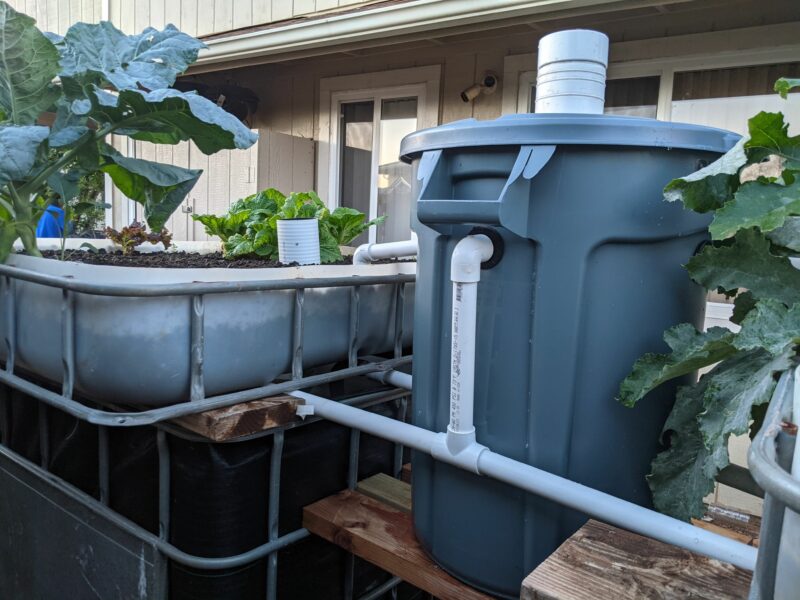
After some online research, I decided to go with these plastic 55-gallon drums. There are a bunch of DIY projects you can find online for these drums and they seemed like the perfect size for my radial flow settler. I found a local food company on Craigslist who were trying to get rid of their drums for $25 each. I managed to fit 6 of them in our Honda Odyssey (we took out all of the backseats except for one) and we were off.
Note: If you decide to use these plastic drums for any kind of gardening, make sure they’re food-safe and weren’t carrying anything that could potentially harm you. The ones I bought were originally used to ship vegetable glycerin and it was really easy to clean them out with a hose once I cut the top off.
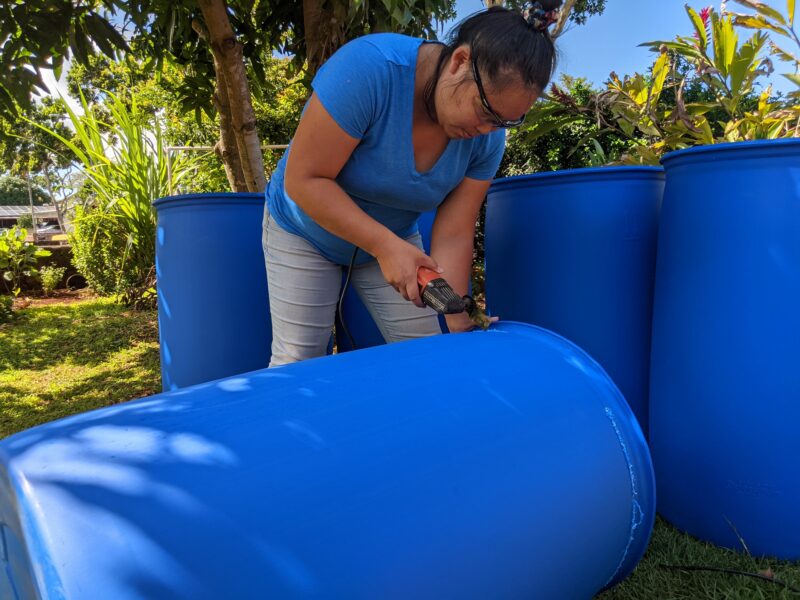
Cutting the drum
The first step was to cut the top of the drum off. I used a multi-purpose tool and it took about 10 minutes to draw the line and make the cut. I have to tell you my back hurt while doing this. I was holding this half-bent position the entire time without moving which is why I had a huge smile in the main image for this post.
The plastic is thick, which slows down the cutting speed drastically. The thickness was a little less than 1/2 an inch, but that meant the structure of the drum was very stable even when the top was completely off. I used a deburring tool to get all of the burrs off (the same tool I used to get the burrs off of PVC pipes).
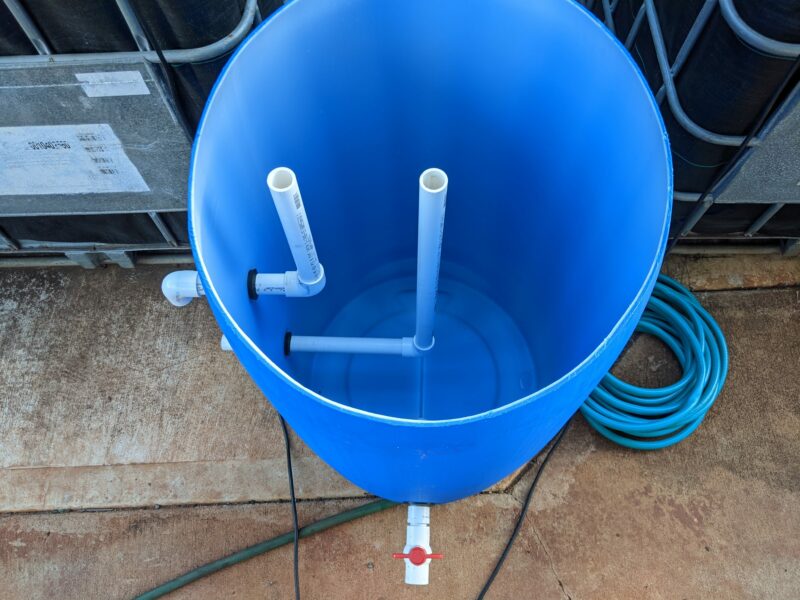
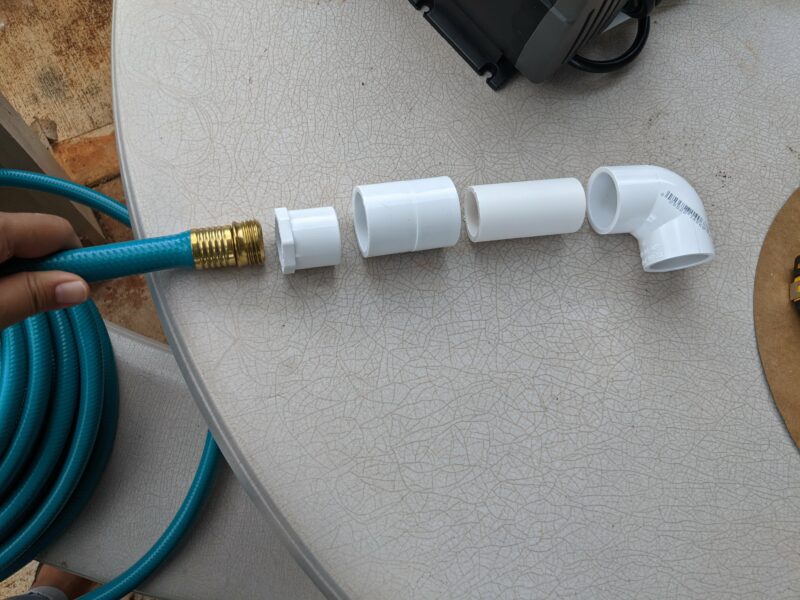
Inner plumbing
For this build I used one-inch PVC pipes, 90-degree PVC pipe connectors, a ball valve, and 3 uniseals. Bulkheads are a bit too pricey and so far uniseals have worked really well for me. Here’s what my inner plumbing looked like before I attached it to the system and filled it up with water.
I won’t go into too much detail of the radial flow settler and how it works. But you can watch this Rob Bob video to understand how this design removes solids from your system. You can find tons of how-to videos and content online, too. Just Google “radial flow settler” or “radial flow filter”.
Here’s the how-to video I based my design on from Rob Bob’s Aquaponics & Backyard Farm’s Youtube channel:
Outer plumbing
The second part of this build is making the “guide” that goes through the cover. For this, I used some 4 1/4-inch (OD) drain pipes my Dad happened to have. The left pipe is an end piece so the wider end would stop the pipe from falling into the drum. The smaller pipe in the middle went into the other end of the long pipe, which would allow me to cover the whole thing with an end cap.
Tip: For those of you who are just learning the lingo, ID means Inside Diameter of a pipe, and OD means Outside Diameter of a pipe. It took me forever to figure out what that meant.
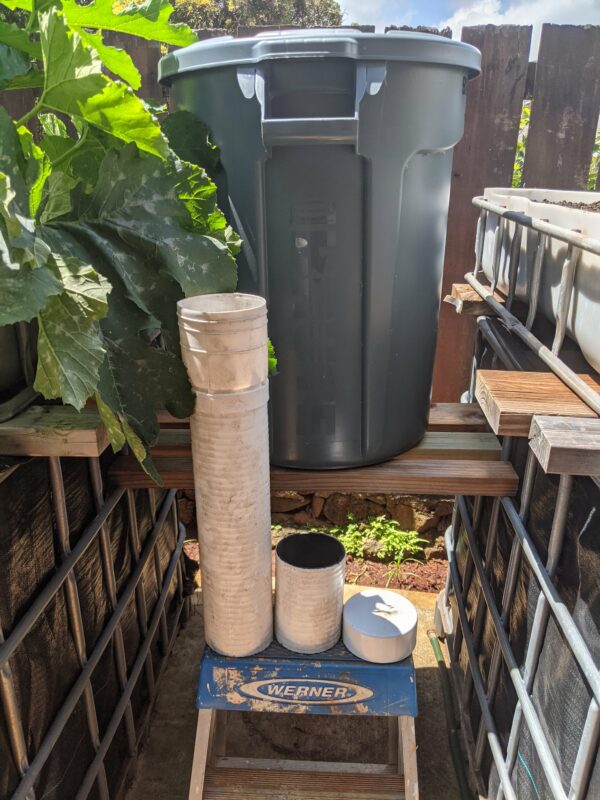
The 4 1/4 inch hole saw was perfect for the drain pipe. The pipe went in smoothly and the end piece was too wide so I didn’t have to worry about it falling through.
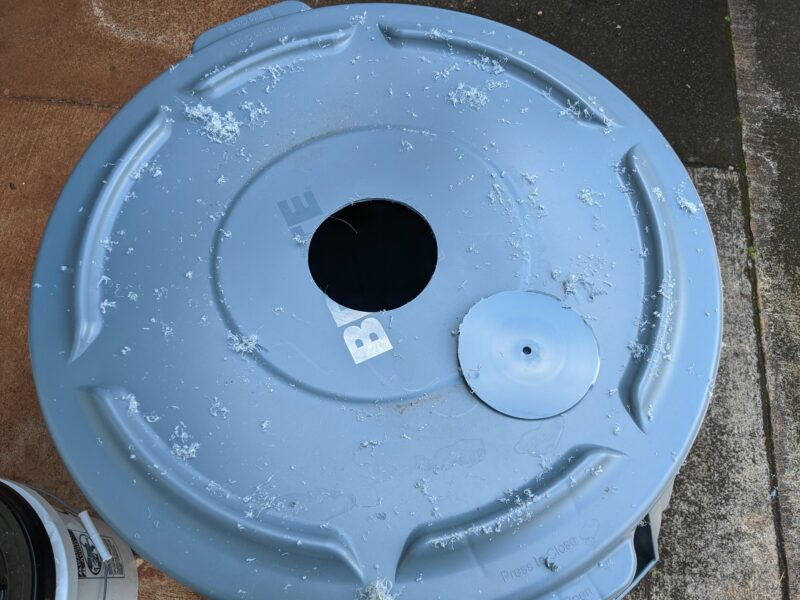
I was originally planning to make this hole in the drum top I had cut off, but the first settler top I cut didn’t fit cleanly to the base when I flipped it over. I found out that the trash can cover that I had initially used (my failed build) fit perfectly so I used this instead. For my second radial flow settler, I adjust my cut and the drum top fit nicely when I flipped it over.
Pump-to-settler plumbing
The biggest headache for me was figuring out the pump-to-filter plumbing and how it would work. As some of you know, when I first began this aquaponic journey, I was completely inexperienced about what I needed, the names of tools and supplies, and going into a hardware store is intimidating when you have no idea how to describe what you need.
Dad stepped in and lent some of his knowledge. I learned that the pumps I had bought connected to hoses, so I had to somehow connect the hose to the PVC pipes that ran through the settler. After a lot of research, Googling, and 6 visits to my local hardware stores during the weekend, I learned a lot about hose fittings, hose barbs, hose-to-PVC pipe connectors, and that hoses come in different widths (I grabbed the first one I saw that was a pretty color and never looked back – that was a mistake).
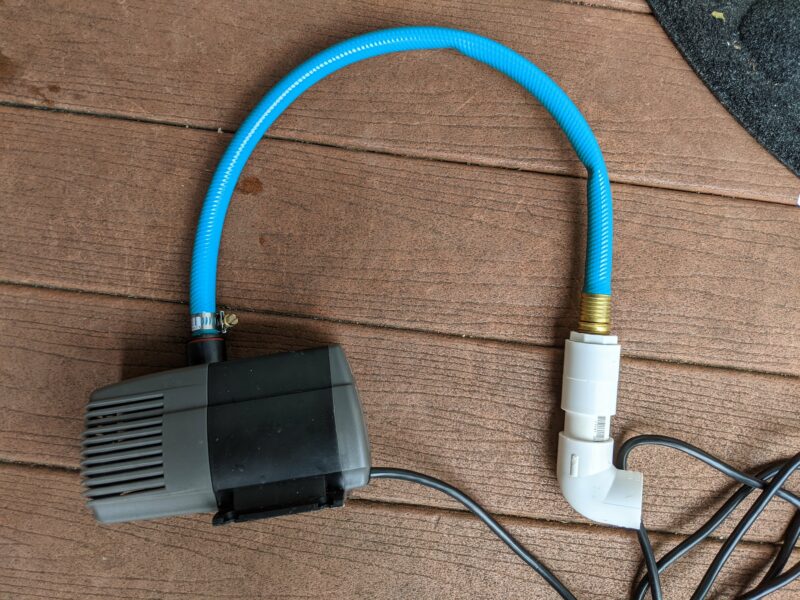
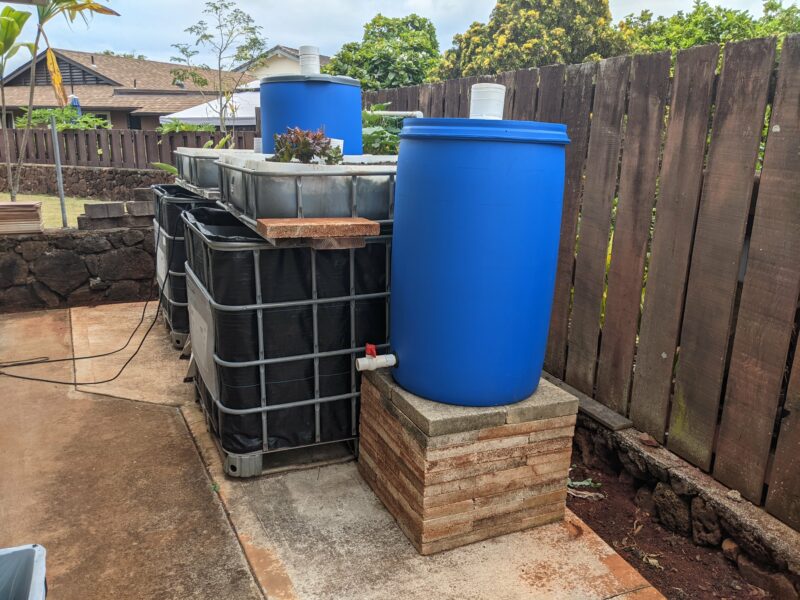
Once I had connected all of the pieces together and turned on the pump, the system worked beautifully. For the system on the left, I was able to raise the filter by inserting three 2x4s that fit on the metal container of the IBCs. I’m not too worried about this radial flow setter falling down since it’s always filled with water and very heavy. However, I do plan to bungee cord it to the system during Hawaii’s hurricane season just in case.
Failed radial flow settler build
As promised, I wanted to share with you my experience of my failed build so you can avoid the same mistakes I did.
Trash bins are too weak
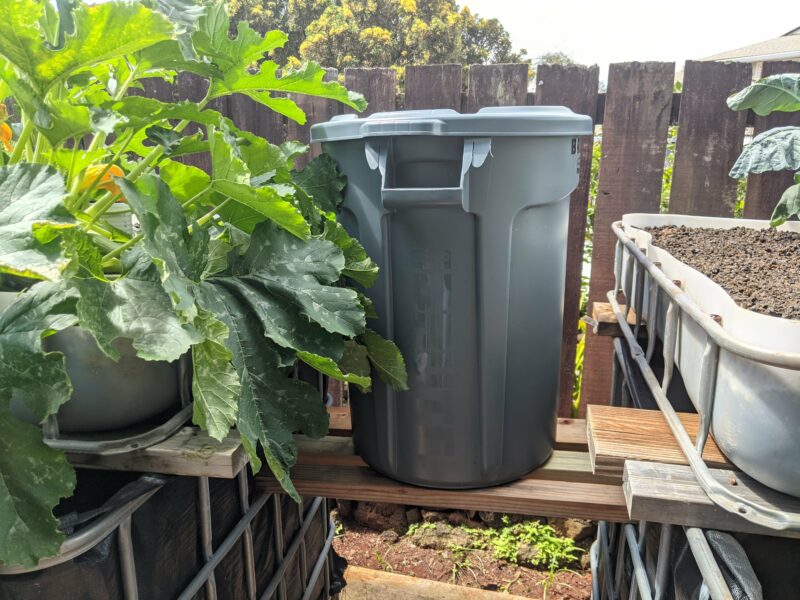
My very first mistake was choosing a plastic trash bin that I got from Home Depot. When I first did my research of how I would make this radial flow settler, I saw some people using smaller 10-gallon trash bins for their various sizes of systems and ponds. So I decided to go for a full size, 55-gallon trash bin. Unfortunately, the plastic for these Rubbermaid trash bins are too weak and pliable. For a settler of this size, the water created too much pressure and there were leaks at 2 of my 3 uniseals.
This leaking problem was why I decided on the 55-gallon drums instead. The thicker plastic was hard and resistant to the pressure and I have had no leaks since installing the drum.
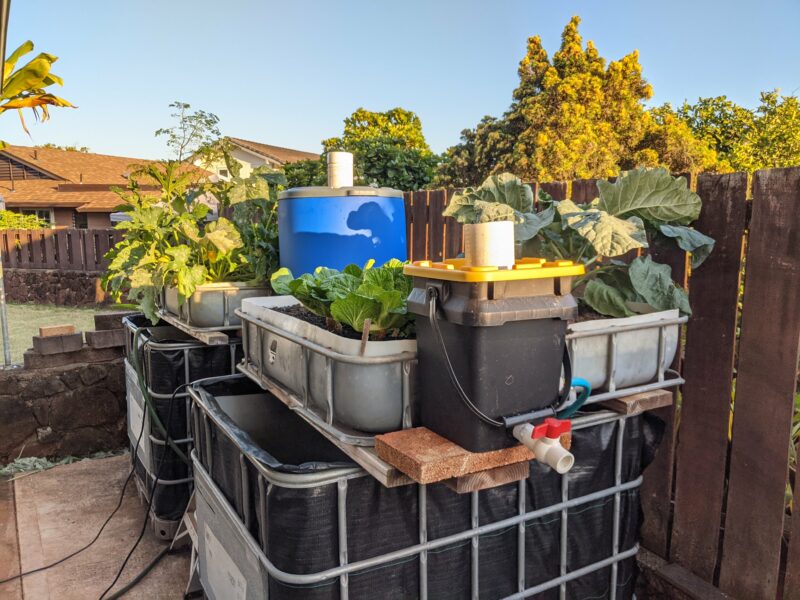
One settler for two systems
As much as possible, keep your systems separate. Don’t share fish tanks, sump tanks, pumps, grow beds, or filters. It causes a lot of headache because if one thing doesn’t work right, the whole thing doesn’t work right.
When I first created this build, I set it up so that both systems ran off the same settler. This was a huge mistake. First of all, the cement in the back of my house is not level. There’s a downward angle so that during heavy rains the water flows out into the dirt and yard and eventually out onto the street and gutters. This means that my system and settler weren’t level and that more water exited one way and less the other.
Eventually, I noticed that within an hour, one fish tank completely ran out of water while the other overflowed. I did everything I could think of to level off the water:
- Fiddling with the pump speed.
- Adding shims beneath the trash bin (this made the leaks even worse since the plastic would bend at the uniseals).
- Adding a third exit for the water in the back of the settler that would direct the water back into the fish tank.
As I made all of these changes, I had to unplug the pump in the fish tank that was low on water, wait for the water to even out again, plug the pump in and see what happens. This was done every time I tried something new and I kept doing this until all sunlight was gone (we don’t have any working lights in our backyard).
I finally gave up and for the rest of the night and thru the next morning, I woke up every 30 – 45 minutes to unplug or plug in a pump to keep the water level and fish alive. My parents had a good chuckle as they had no idea I was going in and out of the house all night and walking past their bedroom like a zombie.
Small radial flow settlers
Since I didn’t have a way to lift the 55-gallon drum for the second IBC aquaponics system, I decided to create a bucket-sized radial flow settler that I could place in the original solids filter spot. While this worked somewhat, it didn’t clean the water as much as I hoped it would (there’s just too many fish in there).
If you’re thinking about a bucket-sized radial flow settler, make sure you don’t overcrowd your fish tank. For an IBC fish tank, I recommend no more than 10 large (“good-eating-size” is what we say in Hawaii) tilapia. If you go with catfish, maybe 8 large ones would be my max, they just don’t stop eating and pooping.
Is it still working?
Yes! I’m happy to report that both radial flow settlers are still working great about 2 months in. I’ve since updated the small bucket settler to a 55-gallon drum and the water (in the tilapia tank) is clear enough that I can easily see down to the bottom. Unfortunately, my catfish water is still murky, which is my fault. There are just too many of them and the system can’t handle it. As soon as they’re gone, I’ll be moving half of my tilapia over which should clear up the water on both sides even further.

If you’re considering to update your solids filter to a radial flow settler for the same reasons I did (too many fish, don’t like cleaning your filter, etc.), then I highly recommend doing so. My water is much clearer than before even though the number of fish is the same. If anything they’ve gotten bigger. But if you plan on only keeping a few or very small fish that won’t overcrowd your system, then you can still get away with a bucket solids filter.