
This post may contain affiliate links, which means I'll earn a small commission if you purchase something through these links. You won't pay any extra; instead, you'll be helping Aloha With Love to thrive. Thank you! Learn more.
--
While I knew that I wanted a bell siphon system, at the time of building I wasn’t yet set on the rest of the plumbing and where it would all go. All I knew was that I had a strong pump that my Dad happened to have in his garage and a vague idea that the water would shoot from the sump/pump up to the growbeds, drip into the fish tanks and somehow return back to the sump. Even the filter hadn’t yet entered my mind because I had a difficult time understanding how filters fit into the flow.
All I wanted was to just get started and go from there. From personal experience, I know that the hardest thing about big projects is to begin them.
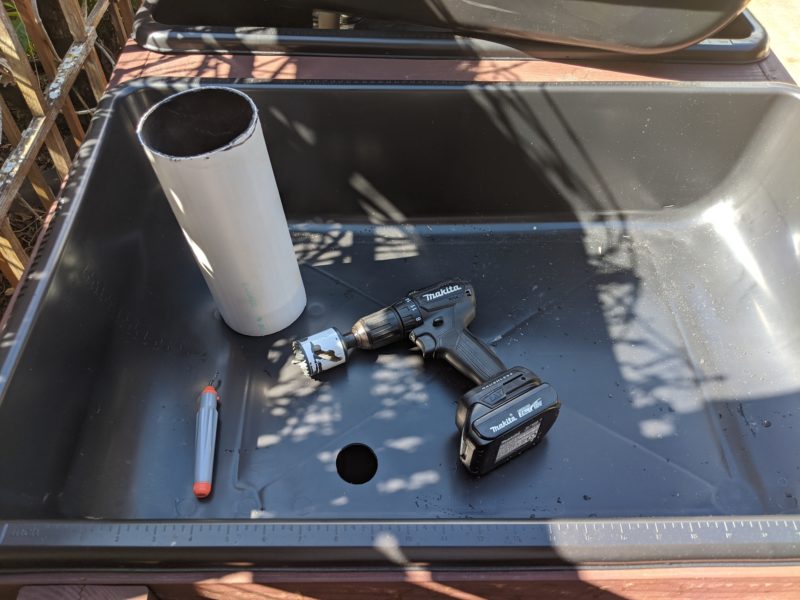
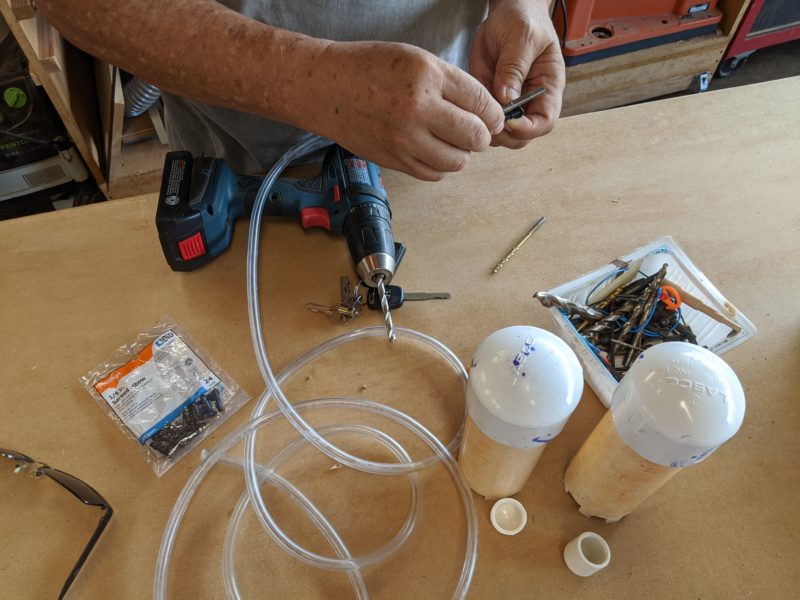
I started with drilling the holes for the standpipe. This was “step 1” for me and while I do have certain parts of the system that I wish I had done better, I am so glad that I stuck with it and learned from the experience. Now I know what I want to change when I update the system or what to do when I build our IBC chop and flip system in our backyard.
I hope this helps you get started on your aquaponic plans!
Aloha with love,
Amy
My Plans
My basic plan included:
- 1 pump
- 1 sump tank
- 6 grow beds
- 6 bell siphons
- 2 fish tanks
- 2 solids filters
- 12 1-inch uniseals
- A lot of 1-inch pvc pipes and connectors
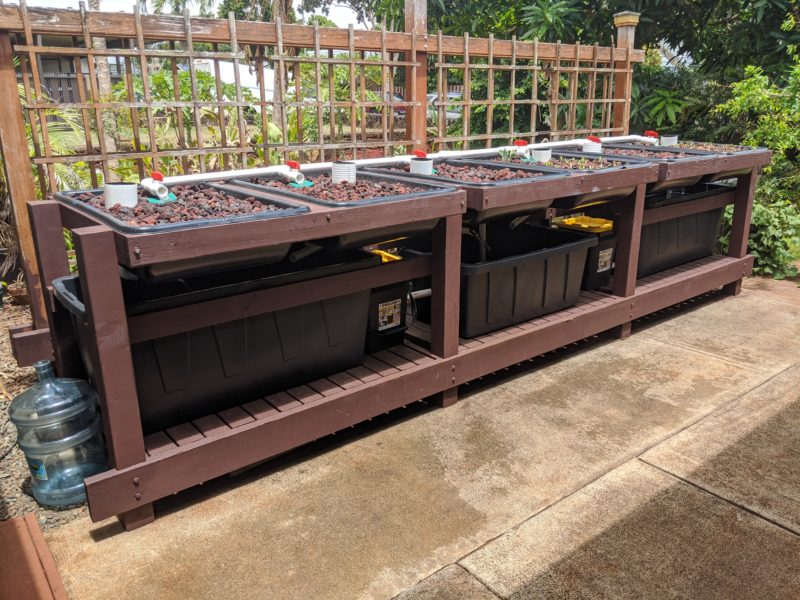
My grow beds were listed under “cement mixers” at Lowe’s in Waipahu, and my fish tanks and sump tanks were 55 gallons and 37 gallons respectively from Home Depot in Pearl City.
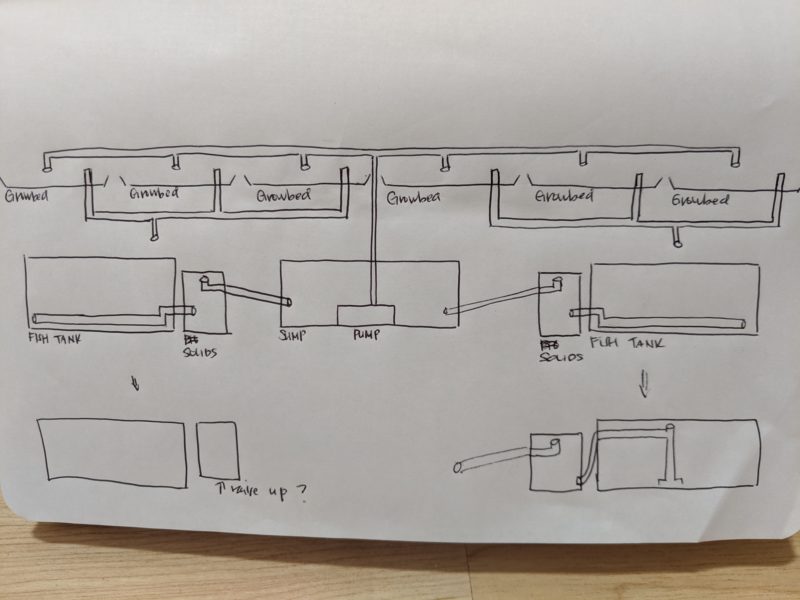
This is the initial plan I had in mind for my aquaponics build when I drilled that first hole into the grow bed. The central sump tank was 37 gallons and would house the pump. The pump would push water up to the 6 grow beds (26 gallons each) and the water would exit via bell siphons into the fish tanks (55 gallons each) – 3 growbeds for each fish tank on either end. From the fish tank, the water would flow into the filter (5 gallon buckets) and as the water rose, it would be cleaned by shade cloth and flow back into the sump.
This was probably my 10th attempt at drawing out a simple blueprint and I recommend it to anyone building out their own aquaponics system. If you’re attempting your own build, you’re probably watching a bunch of YouTube videos and reading blog posts to figure out which system works best for you.
Drawing this out really helped me figure out where potential problems were and I was able to envision the water flow and what path it would take. Plus, it really helped me understand all of those aquaponic YouTube videos out there
Once the plans were done, it was time to build. I bought uniseals from The Aquaponics Place in Waimanalo, but once I realized how easy they were to work with, I bought several more on Amazon. Dad also had an oscillating multitool that was safer than a saw (it gave him peace of mind). So I used that to cut the pvc pipe and make any other cuts I needed.
Bell Siphon System
The bell siphon system was pretty simple once I figured out what I needed. I’ll be honest – it was a little intimidating at first, because everyone on YouTube uses different materials, pipe sizes, and they have their own blueprint that they’re working with. But here’s what I came up with for my system.
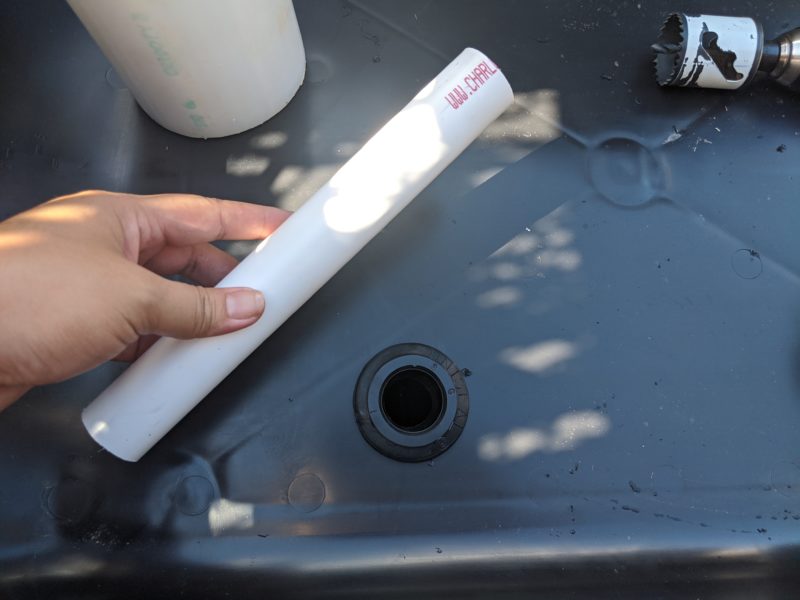
I cut a hole at the bottom of each grow bed with a 1.75″ hole saw, then popped in a 1″ uniseal into each hole. I started out with a 9-inch long standpipe (1″ pvc) but eventually shaved it down to 6.5″ while troubleshooting.
I decided on using uniseals mainly because they were inexpensive and seemed easier to use than a bulkhead. You push them right into the hole and you’re all set. However, I do recommend coating the inside of the uniseal with some vaseline to make it easier to adjust the standpipe as you test the system.
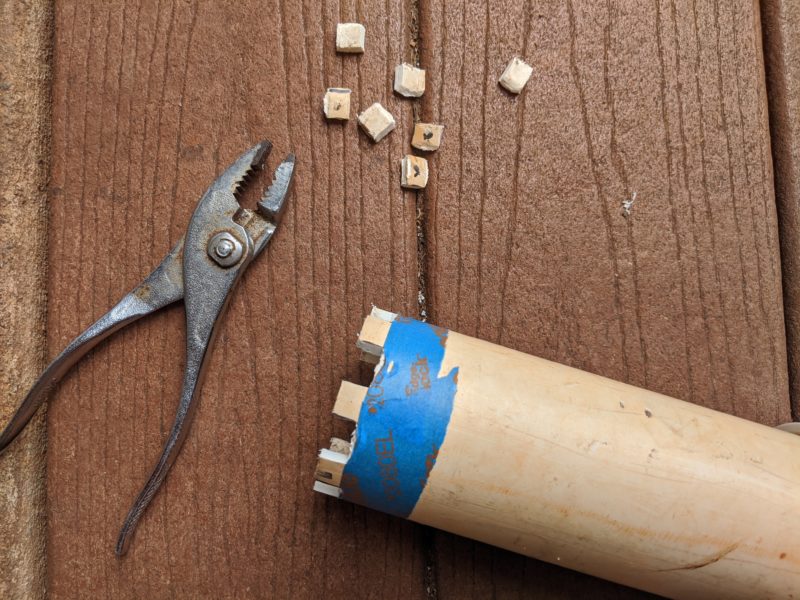
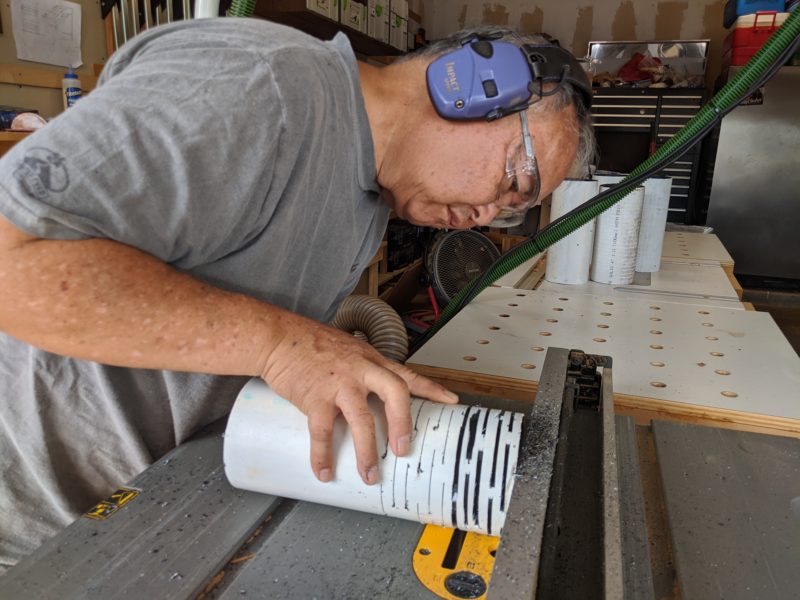
After pushing the standpipe through the uniseal, it was time to make the bell. I used a 2-inch pvc pipe that was taller than the standpipe with an end cap on one end.
My Dad figured out that the easiest way for me to make the “teeth” on the bell was to cut several times into the open end of the bell with the oscillating multitool and use pliers to yank every other square out by hand. Easy, simple, and most importantly safe for someone like me who has very little experience with power tools.
Next came the media guard, which was made out of a 4-inch drain pipe. After completing the whole setup, I think it would be best if you use something a little larger than 4 inches especially for a large aquaponic system. While I was trying to work out the kinks, it was really hard to squeeze my hand into the media guard to adjust the standpipe and bell (and later on the aquarium tubing and floating end cap that you’ll read about at the end).
But, in Hawaii it’s really tough to find anything larger than 4 inches that’s also affordable. The price for these large pipes sky rockets so I just stuck with the 4-inch media guard.
I drew out the lines and Dad used one of his big machines to cut out the slits for me. I could have done this myself with the oscillating multitool, but as we learned with my first attempt, it comes out looking pretty ugly (but it still works).
Connecting Everything With 1-Inch PVC
Once I had all the pipes cut out, it was time to connect everything together. The pump my Dad happened to have in his garage was able to connect to a female connector pvc pipe. From there everything else was 1-inch pvc pipe and different connectors for each turn in the system.
From the pump in the sump tank, the pvc pipe ran up to the top of the grow beds and split into 6 outlets – one into each grow bed.
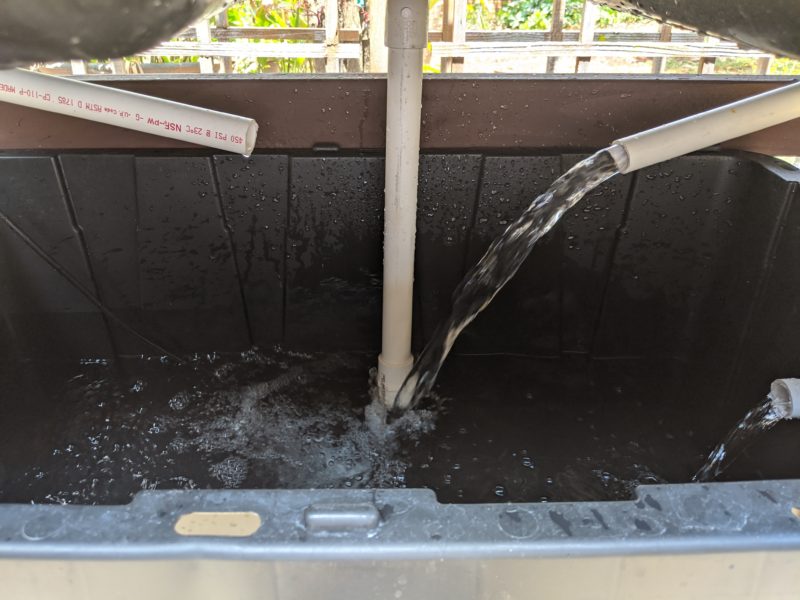
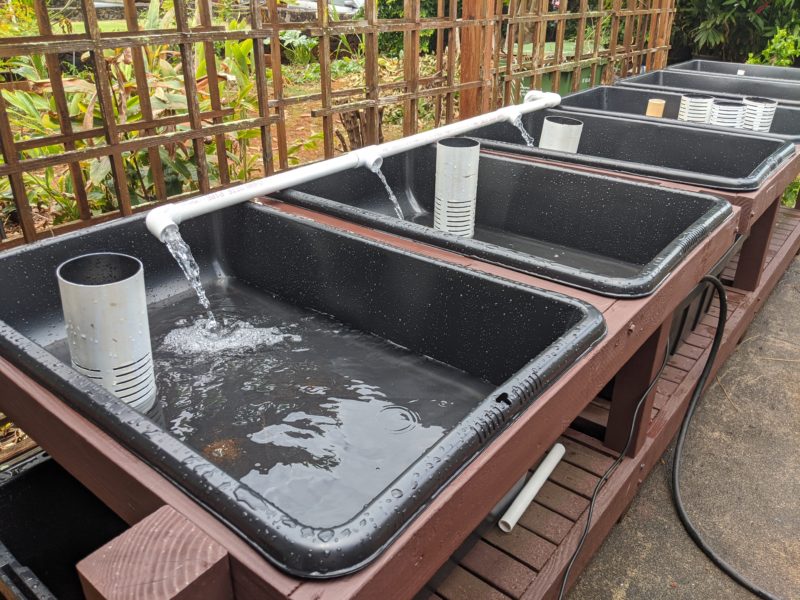
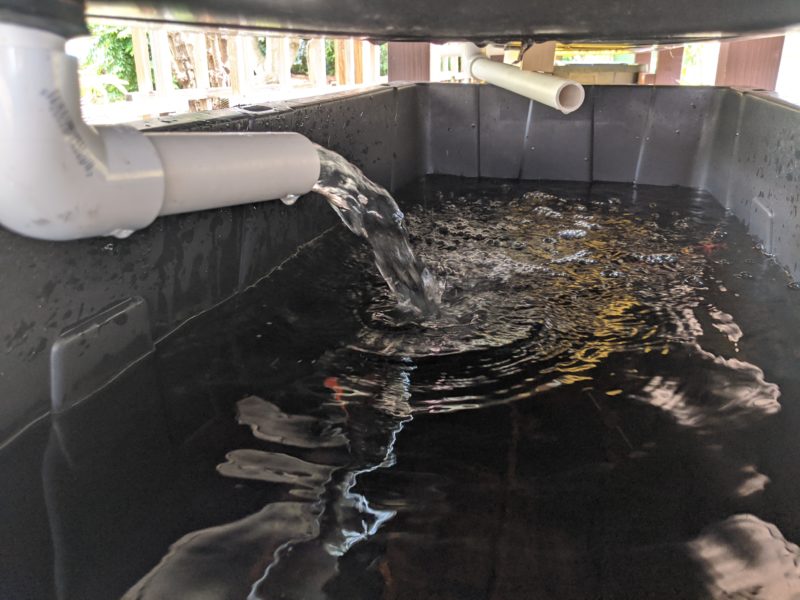
Here’s where I removed a couple of inches off the standpipe. As the water rose in each grow bed, the siphons activated and released water back into the fish tank: the 4 outer siphons released water into the fish tank while the middle 2 siphons released water back into the sump.
During testing I learned that you really can’t test the bell siphon when you don’t have your media in. When your media fills up your grow bed, your water flow rate naturally increases because there’s less room to fill. So in the end, I still had to fill the grow beds up with media and test and tweak my bell siphon.
Using Buckets For Solids Filter
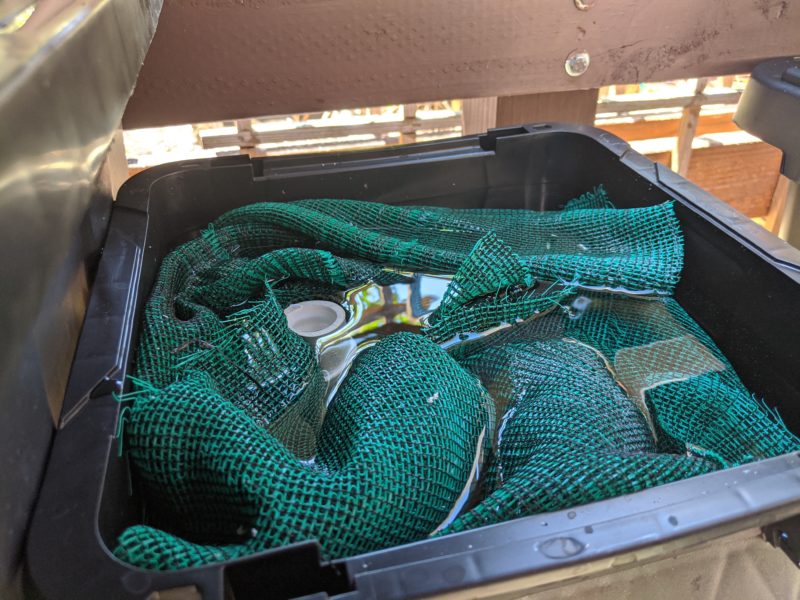
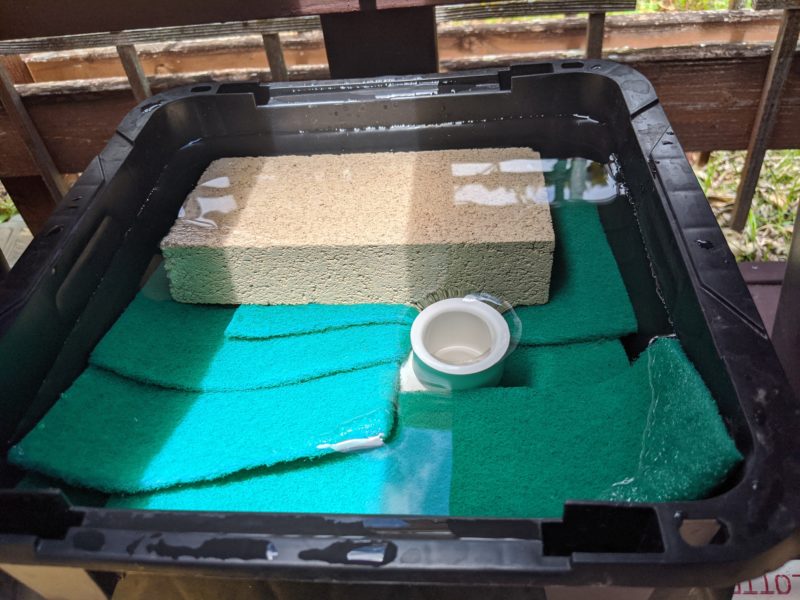
I decided to go with the easiest filter system I could find on the internet: 5-gallon buckets filled with shade cloth and green scouring pads.
The water would enter at the bottom of the bucket and as the water rose the solids would get caught on the material. Clean water gathers at the top and falls into pipe that leads into the sump.
Initially, I put a brick on top of the scouring pads but it actually stayed in place without the brick so I removed it.
Tweaks And Changes
Once the grow beds were filled up with media (lava rock) there were a few changes that I had to make in order for the whole system to run smoothly.
Originally, I had planned for the 3 grow beds on the left to release water back into the fish tank on the left (same for the 3 grow beds and fish tank on the right), but I realized pretty quickly that my fish tank would constantly overflow and my sump tank would run out of water. So I redirected the 2 middle grow bed siphons to release water back into the sump tank (the middle tank on the bottom).
This setup works out much better for the entire system. The water in the fish tank rises and falls about 5 inches and the sump tank only needs to be topped off about every 5 days or so.
Some of the bell siphons also weren’t automatically triggering. The water would reach the top of the standpipe and just overflow. After some research, I figured out that there were 2 ways to combat this:
- Increase the rate of water flowing into the grow bed, or
- Increase the resistance in the drain pipe
Since my pump had only one speed, option one wasn’t going to work for me. Instead, I lengthened the drain pipes which seemed to do the trick in increasing the resistance. For some of the drain pipes, I also had to wedge a block of wood between the drain pipe and bottom of the grow bed to get it to point down into the fish tank or sump tank. The bell siphon won’t trigger if the drain pipe is angled upwards since it doesn’t allow gravity to work its magic.
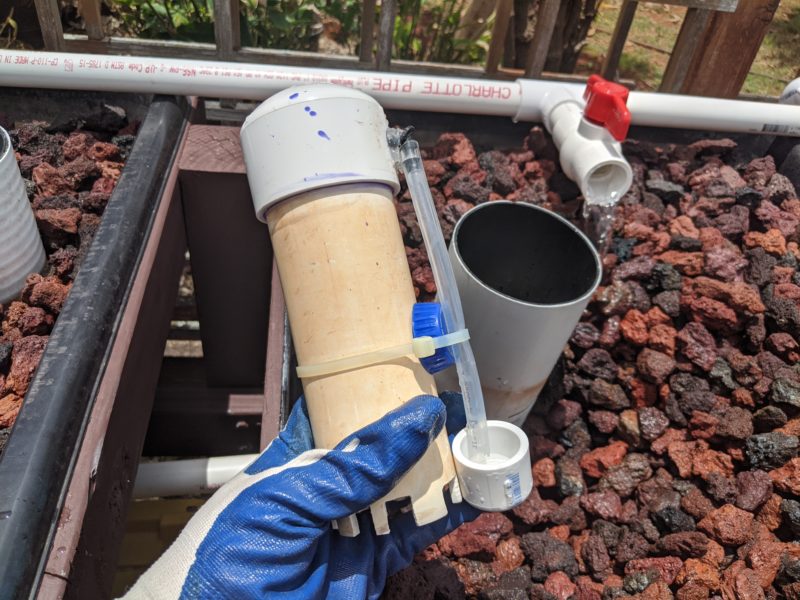
One of the bigger tweaks I had to do was add an aquarium hose and a small end cap to the bell. With larger grow beds like this one, the bell siphon doesn’t stop by itself, which means the grow bed doesn’t automatically fill up with water again.
I was aware of this potential problem before I started my build so when my bell siphons triggered but continued to release water nonstop, I followed this video to allow a larger amount of air into the siphon that would completely stop the water flow.
My thoughts on aquaponics plumbing
This was the first time I felt a really big sense of accomplishment. I researched everything I needed, bought the materials that I believed would work best for me, put everything together and tested it myself. It’s a really great feeling to be able to look at this system every day and know that I was able to understand the mechanics and build everything myself.
The plumbing is also the most mentally draining part in my opinion. You do a bunch of research and planning before and during the build, which can take a lot out of you. But, once the plumbing is done everything else is easy.
The media is just a lot of physical work and after that the fun part of buying fish and growing vegetables begins!
Are you working on an aquaponics system at your house? Let me know how it’s going in the comments below!
Hi there,
Honestly this was really nice to read, thanks for the tips!
I am planning to start aquaponics on my property and I would like to know how much yield do yo get from the system you described? I would also like to know what are the fish tank sizes in litres.
There would be much more questions 🙂 but I dont wont to be boring 🙂
All best from Montenegro, Europe
Aloha Milan! Thanks for reading my post all the way in Europe! From this system, if I plant leafy greens like bok choy, lettuce, arugula, kale, etc…I have to harvest at least a big basketful once a week otherwise they’ll overgrow. I started to grow some tomatoes, zucchini, etc. to slow down the yield and offer some variety. So you’ll have to fiddle with your system to see what works for you and your family. These fish tanks are 55 gallons, but were probably filled up to 45 gallons I’m guessing since you don’t want to fill it up to the top. Hope this helps! Aloha with love, Amy.
1