
This post may contain affiliate links, which means I'll earn a small commission if you purchase something through these links. You won't pay any extra; instead, you'll be helping Aloha With Love to thrive. Thank you! Learn more.
--
Growing green beans in Hawaii is one of the easier vegetables to start off with in your yard. Plus, if you have small kids, green beans will be an extremely fun gardening project for them. The seeds are big, they’re easy to sprout, they grow very fast and take up very little space considering how many beans you’ll get out of them. A set of about 12 green bean plants feeds our family of 4 adults for a little over a month.
I personally love green beans grown in our garden because they taste so different from the ones you get from the grocery. You haven’t tasted a fresh green bean until you’ve plucked it from the vine and dropped it into a hot pan for a few minutes. They are very tender and surprisingly filling. I especially love the crunch with each bite, although Dad loves his vegetables well done, so it’s an ongoing battle between us.
Aloha with love,
Amy
How we plant green bean seeds and transplant them
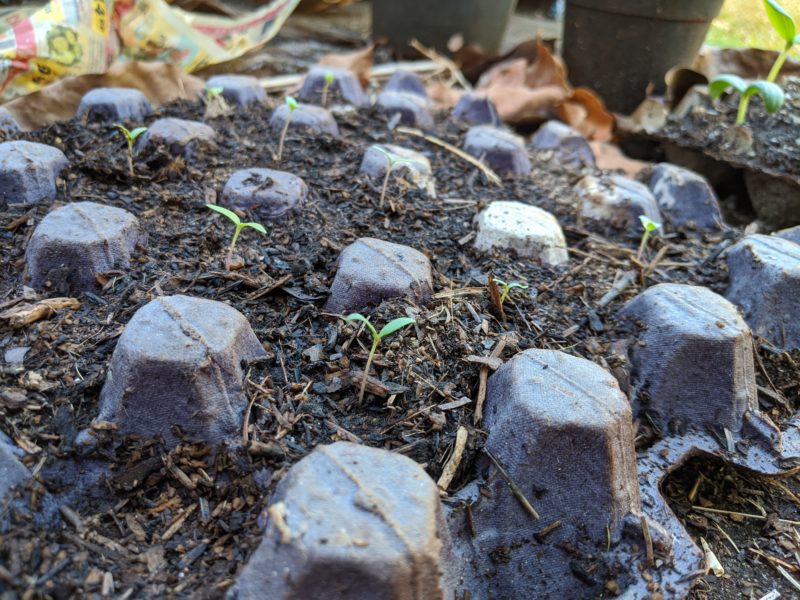
Like most of our plants, we sprout our green beans by adding good potting soil onto a paper egg carton tray that we get from Costco. A seed goes in each pocket and we water it once in the morning. Green beans are very quick, so it should only take a few days for them to pop out. They’ll be fine in these egg trays until they get about 6 inches high. Then they’re ready to be transplanted into soil.
Besides feeling good that we’re recycling this egg carton paper and not just throwing it away into the trash, when it’s time to move them to the soil, the egg carton can go right into the soil like a biodegradable pot. After about 2 weeks of watering, the egg cartons will tear right off and you can transplant the beans without disturbing the roots and stressing the green beans out. I’ll be doing the same thing to these tomatillos plants when they’re big enough. I just need to find some room to plant them in!
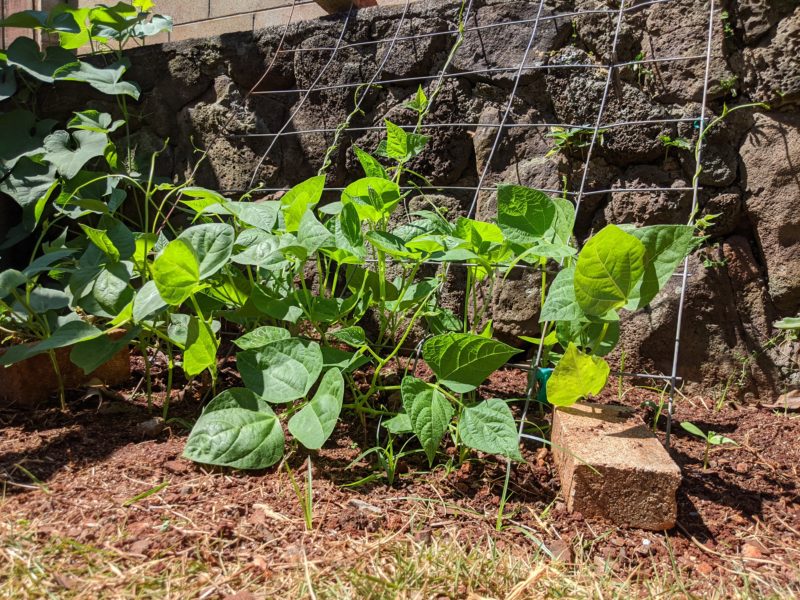
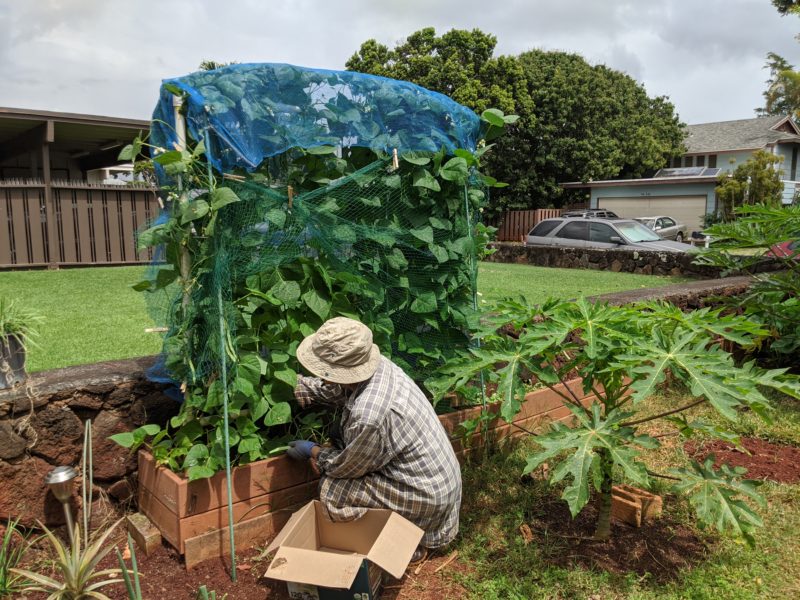
After transplanting the green beans into the yard, they take a few days to get their bearings. But once they figure out where the trellis is, they’ll shoot right up and it is amazing to see how fast their vines twist and climb up in just a day. For this particular crop, we just used an old wire fence we had lying around. We leaned it back against our stone wall and held it down with a few bricks on each side just in case we had some gusty winds come in. The green beans were planted in 2 rows, one in front and one in back of the fencing.
The higher your fence or trellis is, the better. Although you don’t want it too high that you can’t reach the green beans! Aim for about 6 feet and if you have a stool (or a stone wall) to stand up on, then go a little higher. Mom has noticed that if the trellis is too short and there are too many plants, they tend to overcrowd each other at the very top and the leaves start to brown and dry out.
Harvesting the green beans
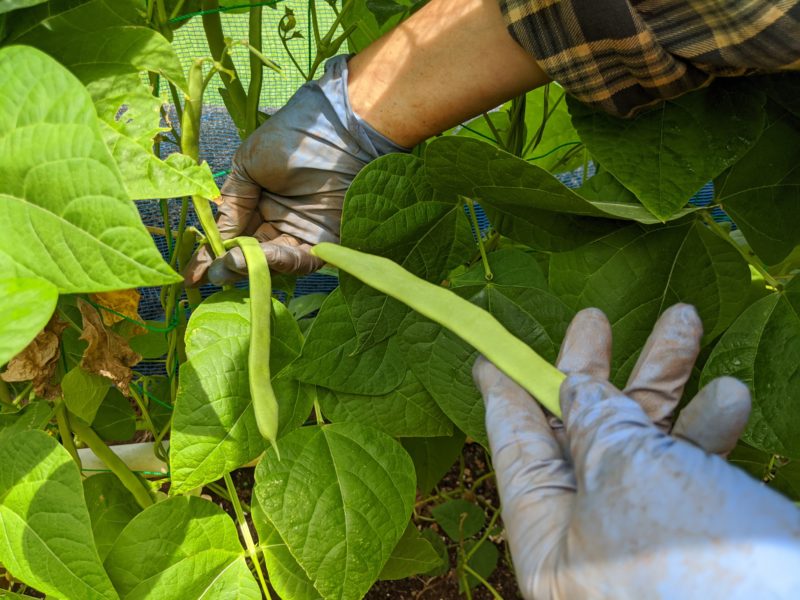
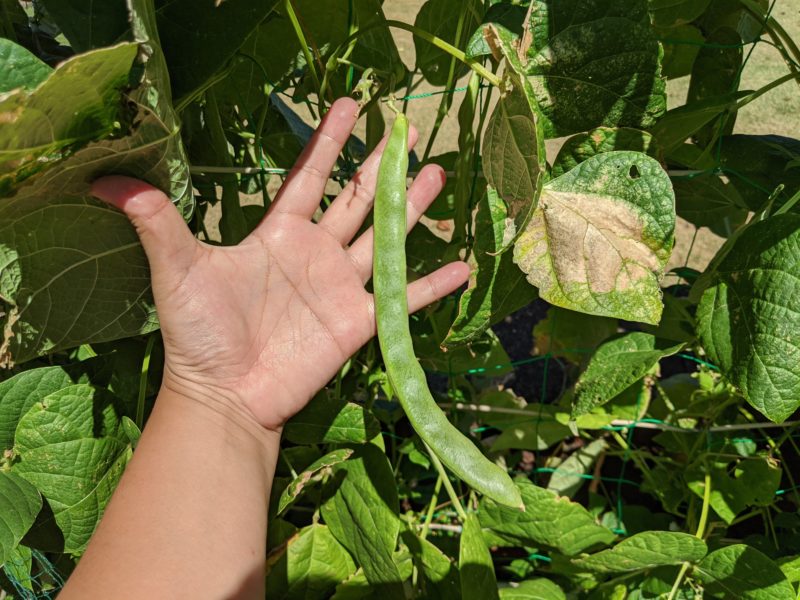
Harvesting is the fun and easy part. In our front yard, Mom has a mature green bean crop that we’ve been harvesting from for over the past month or so. We use 2 PVC pipes connected together with thin rope running across for this one. Every couple of days, we can gather several handfuls of green beans, which is more than enough vegetables for dinner. We aim for picking them when they are just about the length of our hand, fingertip to wrist.
Although it might be tempting to pluck all of the green beans, I suggest leaving a few behind to mature if you truly want to be self-sufficient. These will grow very long to about 12 inches and if you were to eat them, they would be very chewy and tough to eat. Dry out the beans and save them for later so you can replant the seeds for your next crop.
The blue net is to protect the tender young green beans from the birds. They love to eat our papaya, mango, and guava and Mom didn’t want to take any chances with the green beans. However, we might not use this blue netting next time as we’ve noticed another garden with healthy green beans in their garden with no netting. In fact, that neighbor’s green bean trellis is at least 3 times bigger than our setup and they have so many green beans that they have to pick them twice: once in the morning and once in the evening. That’s how fast they grow!
Planting green beans upside down
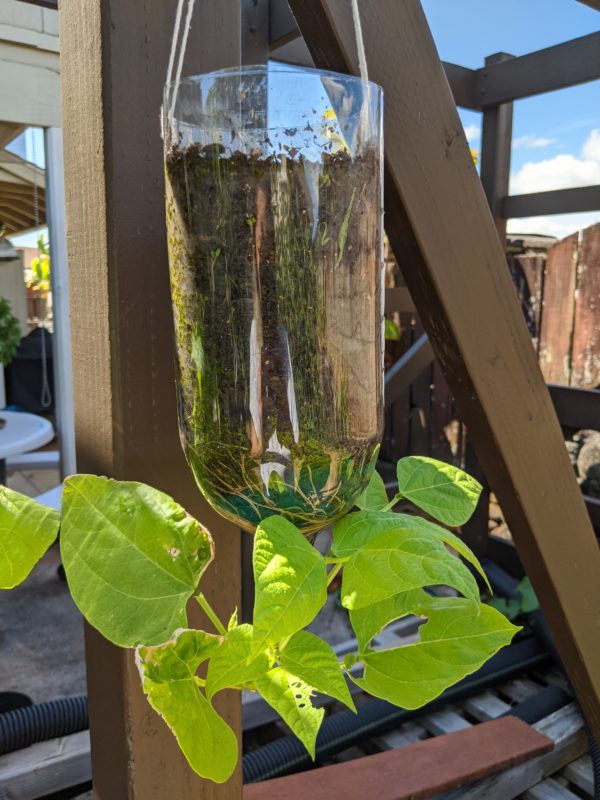
It’s always fun to experiment especially since I have some extra time due to COVID-19. I stole one of Mom’s green bean plants (with her permission) and transplanted it into this makeshift plastic bottle. Mom has been complaining about the slugs and snails eating up her young plants (they love young and tender new shoots) so I thought this would be a fun way to see how green beans grow upside down.
The dried out areas on the left were already there before I transplanted this plant (I took the unhealthiest looking one) and the big hole in the leaf on the right was made by me when I was trying to squeeze the plant through the bottle neck. Ignoring those blemishes, the plant seems to be doing relatively OK compared to its siblings on ground. I was hoping it would find the wooden post behind it, but so far it seems to be in a state of confusion more than anything. The biggest change I see is that some new leaves sprang out almost immediately; however, it looks like something is nibbling on one of the young leaves unfortunately. Regardless, it survived the transplant and it’s fun to see how it’s changing everyday.
Cooking with green beans
Besides eating them raw, green beans are great to cook with! One excellent dish to prepare is Mom’s pork, green beans, and carrots stir fry. It’s a very beautiful dish with the green beans and carrots giving it a nice pop of color. The bite-sized pieces of juicy pork bring a lot of flavor to the table and you’ll surprise yourself with how easy and fast this is to make. It’s great with a bowl of hot rice, but if you’re like me and trying to avoid starch, eat this with some homemade pickled wakame salad.
I purchase some string beans seeds packages from KTA & Ace but it’s not the ones you have! That flat type string beans is what my dad use to grow when I was little I don’t see them in the store no more and would like to purchase some seeds or even some fresh string beans if it’s available?? It’s pictures above in your article! Thank You
Hi Anna! My Mom got these from a friend (you might want to try a gardening group). But she’s seen them at gardening stores/sections around the island. Maybe try some of the smaller stores that sell local seeds. Aloha with love, Amy.