
This post may contain affiliate links, which means I'll earn a small commission if you purchase something through these links. You won't pay any extra; instead, you'll be helping Aloha With Love to thrive. Thank you! Learn more.
--
A few of my friends and I decided to explore the Honolulu Mauka Trail System and chose the Makiki Valley Loop Trail. The loop is actually 3 separate trails that form a triangle and begins right behind the Hawaii Nature Center.
Overall, it was a really nice hike to do especially with a group of friends. There was plenty of shade the whole way and there’s even an “easy” and “difficult” version depending on which direction you choose (clockwise or counterclockwise).
We chose the “easy” way! Guess I know which way we’re going next time!
Aloha with love,
Amy
Local Tip: Makiki Valley Loop Trail (combination of 3 trails) and Makiki Valley Trail (an out-and-back trail) are 2 different hikes. Make sure you have the right information for the hike you’re headed to.
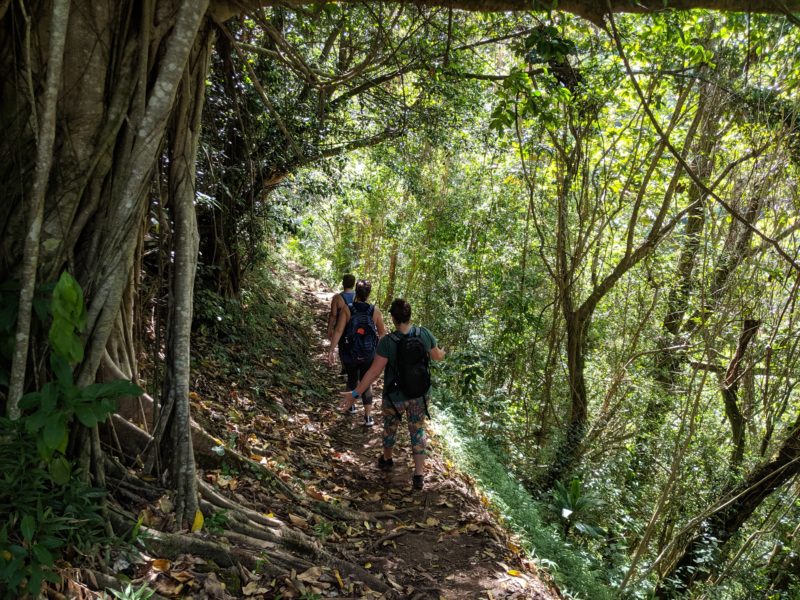
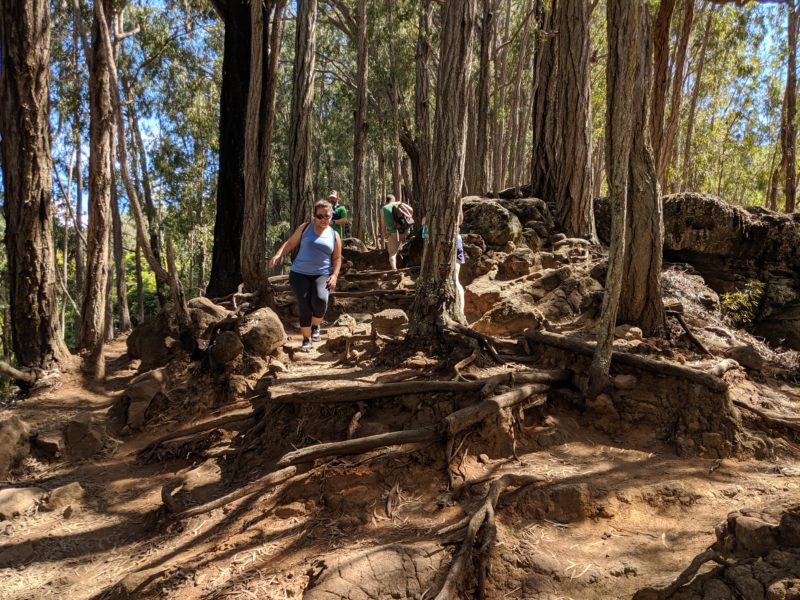
Makiki Valley Loop Trail Is All Forest, Roots And Rocks
What to expect on the Makiki Valley Loop Trail
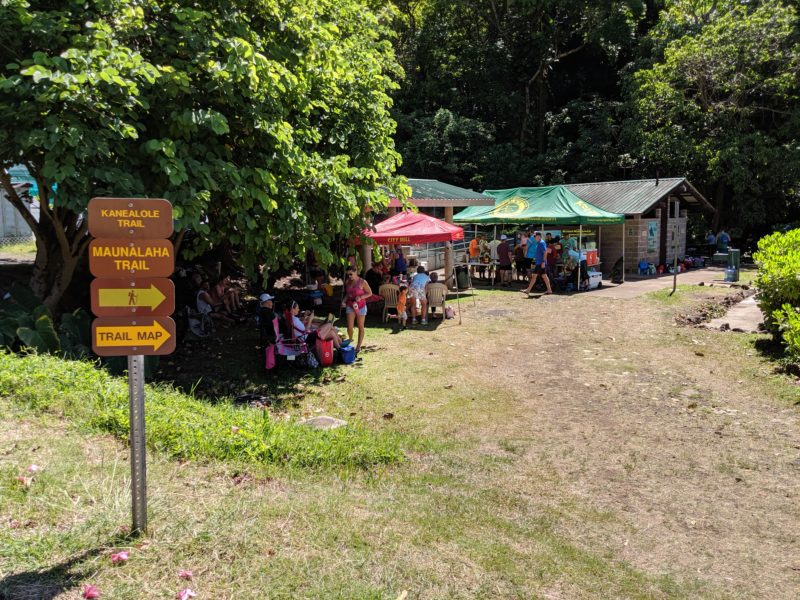
The whole loop took us just over 2 hours to complete with a couple of beginner hikers. Makiki Valley Loop Trail is actually made up of 3 separate trails (clockwise from the trailhead): Kanealole Trail, Makiki Valley Trail and Maunalaha Trail.
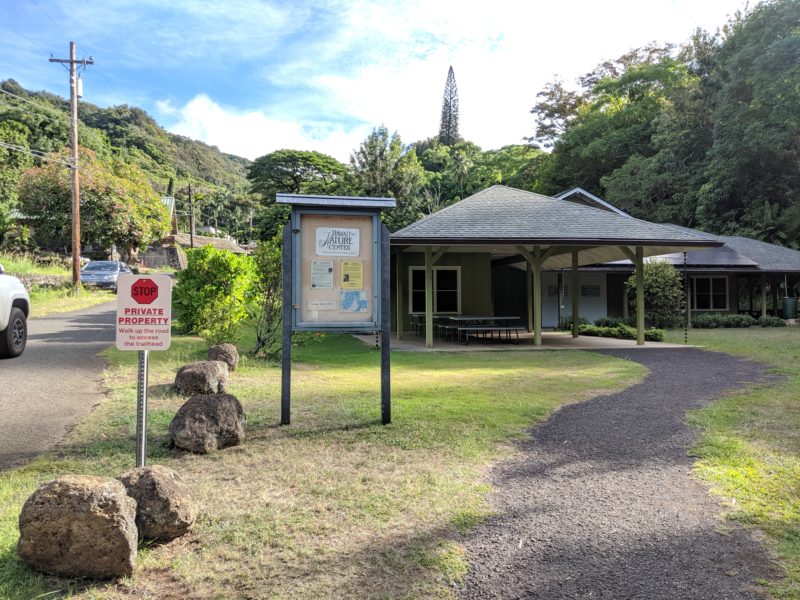
The trailhead begins right behind the Hawaii Nature Center building, so hang a right when you pass it. Walk for about a minute on the trail and you’ll come to a map and 2 choices: right or left.
- Clockwise (left): A slow incline up Kanealole and Makiki Valley Trails, then a fun downhill along the Maunalaha Trail.
- Counterclockwise (right): A sharp and sudden incline up Maunalaha Trail, then a slow downhill on Makiki Valley and Kanealole Trails.
Local Tip: We went clockwise and the beginner hikers in our group were relieved when we reached Maunalaha Trail. They were sure they wouldn’t have liked starting the first third of the hike going up such a sharp incline.
The trail itself was easy to walk on, although you do have to watch where you’re going. There are plenty of rocks and roots to trip you up along the way if you aren’t paying attention. The best part was the shade – the sun almost never hit us and my skin was fine without the usual slather of sunscreen.
Local Tip: I can see Makiki Valley Loop Trail becoming very muddy during and after a rain. There are a couple of baby streams we stepped over, but I’m sure it would be a hazard with a heavy rain. We were fine with normal athletic footwear on somewhat moist dirt, but I recommend proper hiking shoes if it’s been raining recently.

Kanealole Trail
Since we went clockwise, we began our hike on Kanealole Trail. There were a couple of wet spots, but nothing too drastic. The first half was mostly dry, which made it easier. Most of this trail stays at this steady incline and the path is wide enough for a large group to walk together.
Local Tip: This is a popular loop for trail runners. Keep an eye out behind you and move to the side to give them room. There was actually a trail running marathon going on while we were here, which kept us on our toes.
The second half of Kanealole Trail was a little more damp than the first half. We walked around and over a stream toward the end of this trail, which carried over into the first half of the Makiki Valley Trail.

Makiki Valley Trail
The Makiki Valley Trail was the second leg of our loop trail and I found it really enjoyable. The beginning had us stepping carefully over a couple of streams and mushy leaves, but it was minor and my athletic shoes didn’t get muddy at all.
I could really feel that I was in the mountains on this section because there were long stretches where we wouldn’t run into anyone. The wide trail fell away and we were just left with trees on one side and a fallaway hill on our other. There were a couple of information boards scattered here and there, which were a convenient spot to reorient ourselves and learn something new about the nature in that area.
Local Tip: Once the Makiki Valley Trail starts on a steady decline, get ready for some downhill fun on the Maunalaha Trail!
Maunalaha Trail
The third leg of the loop was Maunalaha Trail and once we reached this section, it was an easy downhill all the way to the trailhead. You start off coming out of the forest on a trail and it gradually widens out to a sunny patch of roots and rocks. At one point there’s a tiny view of downtown Honolulu to your left, but it quickly disappears just a few steps down.
As we traveled down, we kept repeating that we were so glad we chose the clockwise route. Imagine if we had gone counterclockwise and decided to begin our day with this massive uphill battle! Although I’m sure there are some of you out there who would enjoy this as an appetizer for your morning run.
Local Tip: We had to pick our steps carefully and bounced left to right depending on where we placed our feet. However, the outer edges were smoothed out and those used to the trail were racing down the sides.
Parking And How To Get To Makiki Valley Loop Trail
Directions to the Makiki Valley Loop Trail
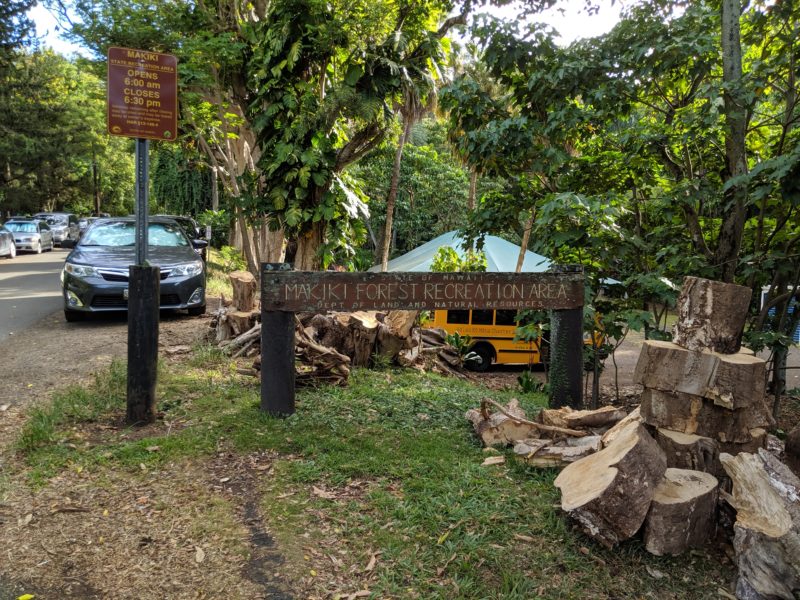
Access to the trailhead is located on Makiki Heights Drive. Set your GPS to Hawaii Nature Center or Makiki Forest Recreation Area. The road will make a sharp hairpin turn to the left; instead, continue straight onto a gravel and dirt road.
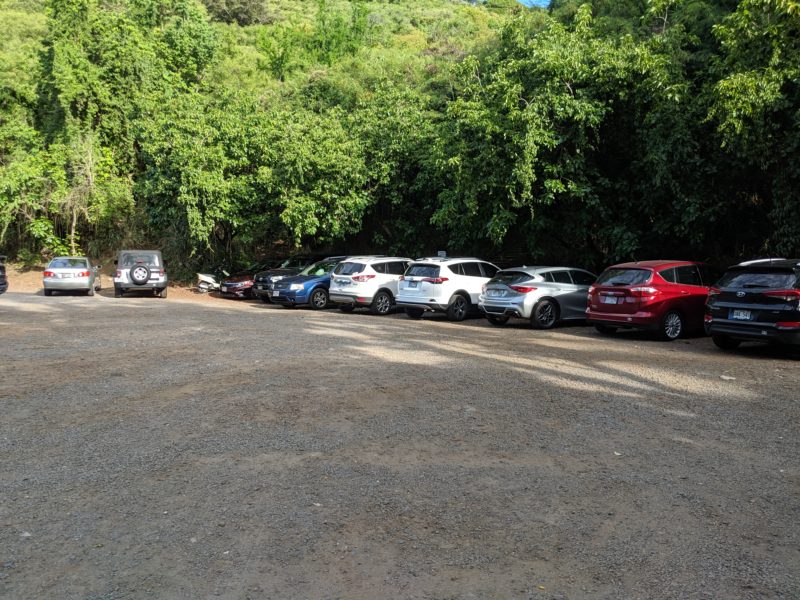
You’ll pass the Makiki Forest Recreation Area sign on your right and further down on your left, you’ll see a large gravel and dirt lot where you can park your car. If this parking lot is full, park respectfully on the side of the road. You can even park on Makiki Height Drive on the grass where there’s room. There are a few residential homes on this street, so please be respectful and mindful especially early in the morning.
Local Tip: Do not be tempted to drive further in and park your car. There is a gate that can close while you’re out hiking and your car can be locked in. The gate was open when we walked in, but sometime during our hike someone had closed the gate and I didn’t see any office nearby that we could have reported to if we had been locked in (Hawaii Nature Center was closed).
Local Tip: As you walk from your parked car to the Makiki Valley Loop Trailhead, you’ll pass the Makiki Arboretum Trailhead on your left. This is a short hike that runs parallel to Makiki Heights Drive and rejoins the road right before the Makiki Valley Loop Trailhead. It’s a nice little warm up that you can add to your hike.
Step-by-step pictures for Makiki Valley Loop Trailhead Access